Over 50,000 hot-selling automation module components.

Bently Nevada 3300 XL Proximitor Grounding Guide

Bently Nevada 3300 XL Proximitor Grounding: Shell Isolation Best Practices

In critical machinery protection systems, engineers often overlook proper proximity transducer installation. Misconfigured grounding protocols frequently trigger severe issues. These issues include shaft vibration signal noise, probe gap voltage drift, and unexpected false alarms on rotating equipment like steam turbines or centrifugal compressors.

Field specialists at Powergear X Automation frequently encounter a recurring technical question. Does the 3300 XL Proximitor Sensor GND terminal connect directly to its metal outer housing? Furthermore, should you electrically isolate the sensor casing from the cabinet backpanel during field deployment? Let us analyze the precise engineering answers based on global factory automation standards.

Technical Breakdown of the 3300 XL Proximitor GND Terminal

The GND terminal on a standard Bently Nevada 3300 XL Proximitor is not a simple protective earth connection point. Instead, it serves as the essential signal reference and shield termination for the eddy current probe. The raw electrical signals from these proximity probes change at a delicate millivolt scale. Therefore, the system requires strict electromagnetic interference (EMI) control to protect signal integrity from high-power variable frequency drives (VFDs) and heavy machinery switchgear.

According to API 670 standards for machinery protection systems, improper signal grounding introduces massive common-mode noise. For instance, an incorrect path easily generates 1X running speed frequency interference. As a result, the control systems read phantom vibration spikes. This unwanted noise ultimately leads to costly, unnecessary emergency shutdowns.

Does the Metal Outer Housing Connect to the GND Terminal?

For standard Bently Nevada 3300 XL hardware architectures, the metal outer housing naturally continuity-tests as common with the internal circuit GND. You can easily verify this low-resistance continuity with a digital multimeter during dry pre-commissioning checks. However, specialized hazardous-area explosion-proof certifications might introduce subtle structural isolation differences.

Our practical field maintenance experience indicates that you must never rely blindly on this casing connection as a primary ground path. In fact, if the sensor housing makes direct, unintended mechanical contact with the control cabinet mounting plate, it creates an unregulated parallel grounding path. Engineers must systematically map out the complete loop before final power-on commissioning.

Why Isolation from the Cabinet Plate Prevents Ground Loops

The core purpose of isolating the Proximitor housing is not to completely sever the ground link. On the contrary, isolation prevents the formation of destructive ground loops. When you mount the sensor directly onto a metallic cabinet plate, you inadvertently establish an uncontrolled circuit path: Proximitor GND to Outer Casing, then to Cabinet Plate, then to Plant PE, and finally back to the Shield Layer.

In large-scale Distributed Control Systems (DCS) or multi-train factory automation networks, different physical grounding stakes naturally develop minute potential differences. Consequently, a loop current flows directly through your measurement circuit. To eliminate this issue, industrial automation engineers must utilize specialized non-conductive DIN rail isolators, insulated mounting blocks, or nylon washers.

Expert Field Installation and Shielding Strategy

To ensure flawless long-term reliability in high-vibration industrial automation environments, installation crews should enforce a strict single-point grounding strategy. This proven technique prevents stray currents from contaminating the signal path.

  • ✅ Enforce Single-Point Grounding: Terminate the extension cable shield only at the monitor rack or safe-area barrier, never at both ends simultaneously.
  • ⚙️ Prevent Mechanical Stress: Always leave an adequate strain-relief loop on the coaxial probe cable to avoid intermittent connection drops caused by continuous structural vibration.
  • 🔧 Protect Against Surges: Deploy secondary, high-quality surge protection devices (SPDs) if cables pass through outdoor pipe racks or high-lightning zones.

Expert Insight from Powergear X Automation: We observe that over 40% of post-startup vibration fluctuations stem from mechanical loosening of the DIN rail clips rather than actual machine faults. Using robust screw-clamp terminal blocks and ruggedized insulating barriers pays off significantly in preventing long-term operational downtime.

Real-World Industrial Application Scenario

Consider a large petrochemical facility utilizing a Bently Nevada 3500 rack interfaced with a central Honeywell DCS to monitor a high-pressure synthesis gas compressor. During initial commissioning, the shaft vibration readings on Channel 3 showed a highly erratic 50Hz noise floor. The field team traced the issue to an uninsulated Proximitor box that was mounted straight to a structural steel girder.

Because the steel girder sat at a slightly different ground potential than the remote instrument control room, a steady loop current scrambled the proximity sensor signal. The fix was straightforward: the maintenance crew inserted a 5mm thick phenolic insulation plate beneath the Proximitor DIN rail and decoupled the housing from the local steel frame. Instantly, the signal noise dropped back to nominal levels, and the monitor gap voltage stabilized completely.

Frequently Asked Questions (FAQs)

Q1: Is it always mandatory to insulate the 3300 XL Proximitor from the panel plate?
No, it depends entirely on your system architecture. If you are using a dedicated Bently Nevada pre-engineered fiberglass housing or a factory-grounded instrument cabinet with a unified single ground grid, additional insulation may not be required. However, in mixed-vendor cabinets containing high-power motor starters or VFDs, using insulating blocks is highly recommended to isolate the signal.

Q2: Can I substitute a 3300 XL Proximitor with older Bently Nevada models directly?
Direct drop-in replacement is rarely advisable without verifying full system compatibility. You must thoroughly audit the specific eddy current probe tip diameter, the total electrical length of the extension cable (typically 5-meter or 9-meter configurations), the system supply voltage, and the scale factor settings programmed inside your 3500 monitoring software modules.

Q3: How do I test if my Proximitor is properly insulated from the cabinet ground?
First, completely disconnect the input probe and the output signal wires from the Proximitor terminal block. Next, switch a digital multimeter to the resistance (Ohm) setting. Place one test lead on the Proximitor metal casing and the other lead onto the bare, unpainted metal of the cabinet backpanel. The meter should display an open circuit or mega-ohm level resistance if the unit is successfully isolated.

Optimize Your Machinery Protection Systems

Are you currently configuring a critical plant upgrade or sourcing authentic condition monitoring components for your machinery protection systems? Do not let improper grounding details compromise your industrial control infrastructure. Explore our extensive, globally verified inventory of precision hardware solutions and contact our dedicated application engineers today by visiting Powergear X Automation to secure reliable parts for your upcoming projects.


Bently Nevada TK-3 Calibration Guide | Proximity Probe Tips

Bently Nevada TK-3 Calibration Guide: Verifying 3300 XL 8mm Proximity Transducer Accuracy

Reliable machine protection systems depend heavily on precise proximity probe measurements. In continuous process industries, engineers use the Bently Nevada 3300 XL 8mm proximity transducer system to monitor shaft vibration and axial position. Over time, mechanical stress, temperature shifts, or loose brackets can compromise loop accuracy. Field calibration using a TK-3 calibration instrument ensures that the transducer, extension cable, and Proximitor sensor form a reliable measurement loop. At Powergear X Automation, we consistently observe that proactive calibration prevents catastrophic equipment failure and eliminates costly false trips.

Technical Analysis: Decoding the 7.87 V/mm Proximity Probe Sensitivity

The 3300 XL 8mm transducer system operates on a standard scale factor of 200 mV/mil (7.87 V/mm). Therefore, a precise displacement shift of 0.25 mm must yield a voltage change of approximately 1.97 V. During a physical verification with a TK-3 micrometer, significant deviation from this 2V target indicates an underlying system fault. Technicians must immediately verify part numbers, check cable lengths, and inspect instrumentation scaling. In our experience at Powergear X Automation, mismatches between 5-meter and 9-meter systems frequently cause severe linearity errors during field tests.

Optimizing Proximity Probe Gap Voltage for Machine Protection

Setting the correct static gap voltage ensures that the proximity probe operates within its linear measurement zone. Industrial control systems rely on this voltage baseline to maintain an adequate safety margin for dynamic vibration tracking. However, improper physical installation often causes the sensor face to sit too close or too far from the target shaft. Consequently, the sensor may saturate or drop out during high-vibration events. Field teams must securely lock the probe in place at the designated voltage midpoint to maintain long-term signal stability.

Ensuring Hardware Compatibility Across Distributed Control Systems

A major pitfall in factory automation maintenance is the cross-generation mixing of proximity probe components. For instance, connecting a newer 3300 XL probe to an obsolete 7200 series Proximitor sensor distorts output signals. Modern plant assets demand strict compliance with original equipment manufacturer data sheets. If you replace a single component, you must recalibrate the entire measurement loop before returning the machinery to service. Our technical team at Powergear X Automation emphasizes that true system authority requires matching sensor lengths, cable impedances, and monitor configurations.

Best Practices for Eliminating Field Errors During TK-3 Calibration

  • Maintain Mechanical Rigidity: Secure the proximity probe firmly within the TK-3 calibration fixture to prevent mounting flex.
  • Eliminate Backlash: Always rotate the micrometer spindle in a single direction when approaching a calibration point.
  • Stabilize Readings: Allow the digital multimeter voltage output to settle for several seconds before logging data.
  • Mitigate Noise: Route extension cables away from high-voltage motor lines to suppress electromagnetic interference.

Industrial Application Scenario: Turbocompressor Protection Upgrade

Consider a critical critical gas compressor running within a petrochemical plant managed by a modern distributed control system (DCS). During a planned maintenance turnaround, technicians upgraded the legacy shaft displacement sensors to the Bently Nevada 3300 XL 8mm system. The engineering team utilized a TK-3 calibration instrument to map the voltage response across a 2.0 mm operational range. By validating the 1.97V response per 0.25 mm increment, they successfully calibrated the Bently Nevada 3500 monitoring rack. This precise configuration protects the compressor from high-amplitude subsynchronous vibrations and prevents unexpected plant downtime.

Frequently Asked Questions Regarding Proximity Probe Validation

Q1: Can a 3300 XL 8mm proximity probe directly replace an older 7200 series 8mm probe?
No, they are not directly interchangeable without replacing the Proximitor sensor. The 3300 XL and 7200 systems utilize different internal electronics and require unique calibration curves to maintain accuracy.

Q2: What is the primary cause of a non-linear voltage output during a TK-3 calibration test?
Non-linear output usually stems from a mismatched system length, such as using a 5-meter probe with a 9-meter cable, or a scratched target surface on the calibration disk.

Q3: How often should industrial facilities calibrate rotating machinery proximity probes?
We recommend verifying probe calibration every 12 to 18 months, typically during scheduled turnaround windows or whenever a sensor component is replaced.

Partner with Powergear X Automation for Premium Control System Hardware

Maintaining the integrity of your machinery protection loop requires authentic, high-performance instrumentation components. Explore our extensive inventory of genuine proximity sensors, monitoring modules, and industrial spare parts by visiting Powergear X Automation to secure your plant’s operational reliability today.

Honeywell CC-PAIH51 Failure: Slot Removal & EMI Guide

Honeywell Experion PKS CC-PAIH51 Diagnostic Error: Will Removal Impact Adjacent Slots?

Industrial control systems demand continuous reliability. When the OK LED on a Honeywell Experion PKS Series 8 CC-PAIH51 high-density analog input module turns off, operators must act quickly. The Experion diagnostic tree usually flags this scenario with an Internal Diagnostics Failure message. This alert indicates an internal hardware malfunction or self-check error rather than an issue with the field loop. Experienced plant engineers frequently worry about the physical consequences of removing this faulty component. Specifically, they fear that an empty slot might expose adjacent I/O cards to electromagnetic interference (EMI). Fortunately, the robust architectural design of the Honeywell Series 8 platform prevents this issue from affecting surrounding modules.

Why Hot-Swapping the CC-PAIH51 is Safe for Neighboring Cards

The Series 8 I/O backplane utilizes advanced electrical isolation and signal integrity design. Each slot functions independently because the analog, digital, and communication buses rely on isolated routing rather than an open architecture. Furthermore, the CC-PAIH51 does not act as a repeater or relay node within the main communication link. Removing the card will not change the bus impedance or disrupt data flow to adjacent slots. The backplane connectors feature integrated grounding to block potential radiation sources. Additionally, Honeywell complies with stringent international electromagnetic compatibility standards like IEC 61000. Therefore, pulling out a single faulty module during standard live maintenance will not cause signal drift or communication errors in neighboring channels.

Differentiating Electromagnetic Interference From Control Logic Impacts

Field engineers must distinguish between raw hardware EMI risks and downstream system configuration changes. While neighboring I/O modules will maintain physical communication, the system completely loses the analog points managed by the removed card. The control system will instantly mark these disconnected channels with Bad PV (Process Variable) or Quality Bad statuses. Consequently, this change can trigger PID loops to switch automatically from automatic to manual mode. In critical environments, these signal drops might even initiate safety instrumented system (SIS) interlocks or alarms. These consequences result entirely from predefined software logic rather than electromagnetic disruption. Engineers must carefully evaluate these application-level impacts before performing a hot-swap.

The Engineering Value of High-Density Series 8 Modules

The CC-PAIH51 high-density analog input module serves as a cornerstone for modern factory automation and continuous process industries. It allows facilities to monitor numerous field instruments within a compact footprint. As a result, plants can minimize control room footprint and significantly reduce total cabinet costs. This efficiency benefits large-scale Distributed Control System (DCS) projects in oil, gas, and chemical refining. However, high-density modules concentrate many loops on a single hardware asset. To mitigate operational risks, automation architects should distribute critical process loops across separate modules. This strategy prevents a single hardware diagnostic failure from disrupting an entire production unit.

Author Insights From Powergear X Automation

At Powergear X Automation, we monitor global lifecycle trends for DCS and PLC components closely. Hardware failures like the Internal Diagnostics Failure are inevitable as systems age in harsh environments. However, these challenges also present opportunities to improve maintenance workflows. Modern DCS platforms offer excellent hot-swapping capabilities, but physical card safety represents only half the equation. Plants must maintain verified backup hardware in their inventory to minimize Mean Time to Repair (MTTR). If you need to replace your faulty modules quickly or want to upgrade your control system infrastructure, explore the certified inventory available at Powergear X Automation to keep your operations running smoothly.

Step-by-Step Field Maintenance Checklist

Before you remove any suspected analog input module from a live backplane, complete these essential steps to ensure safety:

  • Verify the Event Journal: Check for simultaneous power drops or system-wide voltage fluctuations.
  • Review Loop Architecture: Identify every active PID controller and safety interlock tied to that specific module.
  • Switch Controls to Manual: Place all dependent control loops into manual mode or safe states.
  • Inspect the physical latching: Confirm the card sits correctly on the backplane before assuming it is permanently broken.
  • Perform a Controlled Reseat: Re-insert the module firmly to test if a simple loose connection caused the self-test error.

Industrial Application Scenario: Petrochemical Refining

In a large petrochemical plant, a CC-PAIH51 module monitors 32 non-critical temperature and pressure transmitters on a distillation column. Suddenly, the internal diagnostic alarm triggers, causing the OK light to go dark. Because the engineering team distributed the critical column pressure loops across a separate physical card, the plant avoids an emergency shutdown. The maintenance engineer safely puts the secondary temperature loops into manual mode. Next, the technician pulls the faulty card without disturbing the adjacent digital output module. Finally, the team inserts a pre-configured spare card, restores the database connection, and brings the loops back online within minutes.

Frequently Asked Questions

Q1: Does an Internal Diagnostics Failure always mean the CC-PAIH51 hardware is permanently broken?
No, it does not always indicate permanent failure. Transient power spikes, backplane dust, or minor firmware initialization glitches can cause this error. Always try cleaning the connectors and reseating the module in a verified slot before discarding the hardware.

Q2: Can I leave a Series 8 backplane slot empty for an extended period?
While an empty slot will not cause immediate EMI problems, leaving it open long-term is bad practice. Open slots allow dust, humidity, and chemical contaminants to accumulate on backplane pins. Use protective slot covers if a replacement module is unavailable.

Q3: What are the primary hardware items checked during a module self-test?
The internal routine validates the local microcontrollers, onboard RAM and Flash memory integrity, and internal reference voltages. It also continuously verifies the integrity of the Analog-to-Digital (A/D) converters and internal bus interfaces.

Troubleshooting Safety PLC Output Diagnostics | Guide

Resolving False Line Short Circuit Faults in Safety Output Modules

Safety output modules act as the critical execution layer within safety instrumented systems (SIS). These components convert controller logic into reliable field actions, such as emergency valve shutdowns. In critical sectors like petrochemical and factory automation, a single false alarm can trigger an expensive plant shutdown.

Field engineers frequently encounter a frustrating troubleshooting scenario. The system reports a “Line Monitored Short Circuit” fault, yet the field solenoid valve resistance measures completely normal. According to industry field surveys, over 40% of safety module diagnostic errors stem from internal component degradation rather than external wiring issues. This article analyzes why these false alarms occur and how to diagnose them effectively.

Understanding Leakage Current Diagnostics in Control Systems

Modern Distributed Control Systems (DCS) and safety PLCs utilize continuous, micro-ampere test currents to monitor field loop integrity. However, internal MOSFET degradation can severely disrupt this delicate diagnostic mechanism. When an output channel experiences minor drain-source leakage, the static current rises significantly. Consequently, the internal diagnostic circuit misinterprets this leakage as a field short circuit. Practitioners must measure the leakage voltage during the channel OFF state. A residual voltage exceeding 1.5V usually indicates internal transistor leakage rather than external loop degradation.

Analyzing Driving Channel Switching Consistency

Healthy safety output cards must maintain sharp rise and fall edges during ON/OFF switching cycles. Industrial automation systems rely on clean waveforms to differentiate between normal operation and circuit faults. When internal gate driver ICs suffer insulation aging, the channel turning-off edge slows down drastically. This waveform trailing leaves a residual voltage that breaches the short-circuit diagnostic threshold. Therefore, testing engineers should use oscilloscopes to compare suspicious channels with adjacent healthy ones during preventative maintenance cycles.

Isolating Internal Faults via the Load Isolation Method

To confirm whether the fault lies within the hardware, engineers should utilize the load isolation method. First, completely disconnect the field solenoid valve wiring from the output terminal block. Second, observe whether the system continues to flag the short-circuit error. If the error persists under zero-load conditions, the internal current-sensing resistor or comparator is likely faulty. Experience shows that isolating the field loop immediately eliminates 60% of external environmental variables during emergency field diagnostics.

Validating Safety Loop Integrity with Dummy Test Resistors

Substituting the field load with a standard power resistor provides definitive diagnostic proof. Engineers typically use a 1 kΩ to 10 kΩ dummy resistor to simulate a normal solenoid load. If the module clears the alarm with the resistor but fails with the valve, the problem resides in field insulation. Conversely, a persistent alarm confirms internal component failure. Utilizing this systematic validation method prevents unnecessary module replacements and significantly reduces mean time to repair (MTTR) in industrial plants.

Mitigating Surge and Vibration Risks in Harsh Environments

Harsh industrial environments expose safety cards to high electrical surges and mechanical vibrations. For instance, large compressor stations generate massive electromagnetic interference (EMI) that distorts diagnostic thresholds. To protect sensitive safety electronics, installations must incorporate external transient voltage suppressors (TVS) or RC snubber modules. Furthermore, engineers should route signal cables through dedicated, shielded twisted pairs. Keeping control lines separated from variable frequency drive (VFD) power cables prevents induced voltage from triggering false short-circuit alarms.

Powergear X Automation Expert Insights on Module Replacement

Replacing safety output modules requires strict adherence to international safety standards like IEC 61508. Even when different module versions share identical physical footprints, their internal short-circuit diagnostic thresholds often vary. A mismatch in line monitoring algorithms can cause immediate false trips upon system boot. Therefore, global engineering teams must perform comprehensive Factory Acceptance Testing (FAT) before deploying modified hardware. If you are experiencing persistent loop faults or require reliable, certified hardware for your facility, explore the premium industrial control solutions available at Powergear X Automation to optimize your system uptime.

Industrial Application Scenario: Petrochemical Emergency Valve Loop

In a refinery hydrocarbon processing unit, a critical safety output module repeatedly triggered false short-circuit alarms on an emergency shutdown (ESD) valve loop. The field maintenance crew checked the solenoid valve coil, recording a perfect 24-ohm resistance. However, the safety PLC refused to clear the fault, blocking the plant startup sequence. By applying the dummy resistor technique, the engineering team isolated the card and discovered an internal MOSFET breakdown caused by historical inductive voltage spikes. Replacing the module and adding an external TVS diode completely resolved the intermittent tripping issue.

Frequently Asked Questions (FAQ)

Q1: Why does a safety module report a short circuit when the solenoid coil resistance is normal?
This discrepancy occurs because the module monitors the loop via active current diagnostics, not just static resistance. If the internal output MOSFET suffers minor leakage or the diagnostic comparator drifts, the module senses an overcurrent state. Thus, the system flags a short circuit even though the external field component remains healthy.

Q2: Can I disable line monitoring on a safety output card to bypass false alarms?
While some systems allow you to turn off diagnostics configuration-wise, doing so is highly discouraged in functional safety applications. Disabling line monitoring lowers the Safety Integrity Level (SIL) rating of the loop. Consequently, the system will fail to detect real open or short circuits, violating safety compliance standards.

Q3: How do inductive loads contribute to safety output card failure?
Solenoid valves are highly inductive loads. When a channel turns off, the collapsing magnetic field generates a massive reverse voltage spike (back-EMF). Without adequate snubber or diode protection, these repeated high-voltage surges gradually degrade the internal MOSFET junctions, eventually causing a permanent short-circuit failure mode.

Troubleshoot Honeywell FC-SDO-0824 Short Circuit Alarms

Troubleshooting Honeywell FC-SDO-0824 Line Monitored Short Circuit Alarms

The Honeywell FC-SDO-0824 safety digital output module plays a critical role in safety instrumented systems (SIS). This module drives field execution components such as solenoid valves and emergency shutdown valves. Furthermore, it continuously monitors loop integrity to prevent dangerous failures. When the system triggers a Line Monitored Short Circuit alarm, it indicates an abnormal current signature in the output loop. The module interprets this anomaly as a load short circuit or a severe leakage fault.

In petrochemical plants, refineries, and natural gas facilities, this alarm provides immense operational value. It protects the output circuitry from overcurrent damage. More importantly, it guarantees the predictability of emergency shutdown actions. This fail-safe behavior prevents dangerous scenarios where a valve fails to move but the system assumes completion. However, field experience shows that these alarms rarely stem from logical errors. Instead, engineers typically trace the root cause to field loads, cable degradation, or internal component wear.

Understanding Technical Specifications and Loop Thresholds

The Honeywell FC-SDO-0824 module utilizes a micro-current injection technique to evaluate loop integrity during downtime. This method detects open circuits, short circuits, and ground leakage. Over extended operational cycles, solenoid valve coils frequently experience insulation degradation. This wear creates a non-fault leakage current that tricks the module. Consequently, the control system registers a false short-circuit condition rather than a standard operational state.

Environmental factors also influence these technical thresholds significantly. High humidity and corrosive gases accelerate the breakdown of field wiring insulation. For instance, in hydrogen sulfide processing units, insulation resistance often drops from megaohms to thousands of ohms. This marginal decline falls directly into the module fault window. Therefore, maintenance teams must recognize that many short-circuit alarms represent borderline insulation failures rather than true dead shorts.

The Role of MOSFET Degradation in Module Failures

Modern factory automation safety modules rely on advanced field-effect transistors (MOSFETs) for high-side and low-side switching. When an internal MOSFET suffers electrical or thermal stress, it undergoes partial breakdown. This damage manifests as a semi-shorted state between the drain and the source terminals. As a result, a persistent leakage current passes through the circuit even when the channel remains officially turned off.

The internal diagnostics of the safety system constantly monitor these residual currents. If a MOSFET fails internally, the diagnostic routine assumes the external load contains a bypass path. This internal component degradation triggers a false Line Monitored Short Circuit alert. Therefore, engineers cannot assume the field device is faulty whenever this specific alarm populates the DCS workstation.

Furthermore, these safety modules feature channel-to-channel isolation paired with periodic diagnostic scan cycles. If a single MOSFET behaves erratically, the anomaly can distort the diagnostic reference base for adjacent channels. This phenomenon causes intermittent alarms across dense valve island installations. If the alarm matches the system scan interval precisely, internal hardware degradation is highly probable.

Field-Proven Diagnostic and Maintenance Strategies

When a channel exhibits a persistent short-circuit alarm despite normal static resistance measurements, engineers must deploy systematic isolation methods. First, disconnect the field wiring directly from the terminal block of the suspect channel. Second, connect a calibrated dummy resistor load rated between 1 kΩ and 10 kΩ across the terminal. If the alarm persists, the internal MOSFET has definitely failed. Conversely, if the alarm clears, the fault resides in the field cabling or the valve coil.

Cross-channel swapping offers another highly reliable validation technique for site technicians. Swap the field wiring of the problematic channel with an adjacent, fully functional channel. Observe the diagnostic behavior on the human-machine interface (HMI). If the fault follows the physical wiring, the external circuit requires immediate remediation. If the fault stays locked to the original terminal, the module hardware requires replacement.

To confirm internal MOSFET damage without advanced laboratory equipment, Powergear X Automation recommends a three-part diagnostic process. First, remove power and measure the resistance from the output terminal to the common rail. A degraded channel will show a lower resistance value compared to healthy channels. Second, monitor the unpowered state with a milliammeter to catch residual leakage currents. Third, verify if adjacent channels function flawlessly while the target channel continuously faults.

Industrial Application Scenario: Petrochemical ESD Systems

In a large-scale chemical processing facility, an emergency shutdown (ESD) system utilized Honeywell safety modules to manage critical isolation valves. During routine operations, a critical output channel began reporting intermittent short-circuit faults. The maintenance team verified the physical solenoid valve resistance, which indicated a perfect 120-ohm coil condition. This discrepancy halted production discussions due to safety compliance risks.

Applying the isolation method, the automation team installed a 2.4 kΩ test resistor at the marshalling cabinet. The safety system continued to report a line fault on that specific slot. This confirmed that the internal switching transistor had reached its end-of-life threshold. By replacing the module and updating the firmware configuration, the plant restored full SIL3 compliance without extending the planned maintenance window.

Expert Viewpoint by Powergear X Automation

From the perspective of Powergear X Automation, safety lifecycle management requires proactive component evaluation rather than reactive firefighting. Modern industrial control systems depend heavily on the precision of safety components. Hardware components face extreme stress in continuous process industries. Standard preventive maintenance schedules often overlook the subtle parameters of electronic degradation.

We recommend that plant operators maintain a strategic inventory of certified safety I/O modules. When a safety channel exhibits inconsistent diagnostic behavior, treating the component as a degraded asset preserves plant safety margins. Attempting to bypass these diagnostic warnings compromises the safety integrity level of the entire enterprise. To secure authentic replacement hardware and explore reliable inventory options, industrial operators can access the comprehensive catalog at Powergear X Automation to support ongoing system integrity.

Frequently Asked Questions

Q1: Can a mismatched solenoid valve power rating trigger a short-circuit alarm on the FC-SDO-0824?
Yes. If the inrush current of the field solenoid valve exceeds the maximum current threshold of the safety module, the diagnostic circuit flags the event as a short circuit. Engineers must always cross-reference the coil hold-in current with the channel specifications.

Q2: How does firmware versioning impact replacement compatibility for safety modules?
Safety systems require strict compatibility validation. Replacing an older safety module with a newer hardware revision without updating the controller configuration can cause diagnostic synchronization errors. Always consult the manufacturer compatibility matrix before hot-swapping modules.

Q3: What is the recommended safety inspection interval for these output modules?
The inspection interval must align with the overall Safety Instrumented System proof testing schedule, typically every 12 to 24 months. Operators should conduct loop resistance tests and verify diagnostic feedback loops during these intervals to detect early component wear.

Troubleshooting DCS Ground Interference on SPDSI14 & SPDSO14

How to Troubleshoot ABB Symphony SPDSI14 and SPDSO14 Channel Faults and Ground Voltage Interference via Terminal Blocks

Understanding Module Missing and Bad Quality Alarms in DCS Control Systems

In processing plants like petrochemical or power generation facilities, engineering teams frequently encounter persistent “Module Missing” or “Bad Quality” alarms on ABB Symphony SPDSI14 (Digital Input) and SPDSO14 (Digital Output) modules. However, these system warnings do not always indicate a permanent hardware failure. For factory automation systems running over many years, external grounding anomalies, stray currents, and ground potential differences often trigger these faults instead.

Many field technicians routinely replace expensive I/O modules only to find the same errors return shortly after. Therefore, prioritizing a terminal block isolation protocol allows maintenance teams to verify external ground voltage interference before swapping hardware.

The Critical Role of Electrical Isolation in Industrial Automation

The SPDSI14 and SPDSO14 modules handle vital digital signaling for interlocking, alarming, and equipment startup sequences within the Distributed Control System (DCS). Because these modules operate at millisecond speeds, external voltage fluctuations directly impact control loop reliability.

Proper channel isolation prevents dangerous ground loops from forming between field instruments and the central control cabinet. Moreover, robust isolation dampens common-mode interference generated during the startup of nearby variable frequency drives (VFDs) or high-voltage motors. When severe ground potential differences exist across remote processing areas, excessive voltage bleeds into the digital loops, drifting signals and confusing the DCS diagnostics.

How Stray Ground Voltage Triggers False Module Disconnections

Engineers often assume that a “Module Missing” status means the hardware has completely failed or disconnected from the backplane. In many actual application scenarios, ground voltage drift or a floating communication reference causes transmission errors across the cabinet bus.

When external electromagnetic noise breaches the I/O circuitry, the local reference potential rises sharply. This increase creates high bit-error rates during data exchanges between the module and the controller. Consequently, the DCS reports intermittent disconnections or transient “Bad Quality” bits. These issues appear more frequently in legacy facility migration and upgrade projects where aging cable networks deteriorate over time.

Step-by-Step Field Diagnostics Using Terminal Block Isolation

Field technicians can systematically isolate external loop interference without dismantling running hardware by following this three-step methodology:

  • Step 1: Disconnect Field Wiring: Keep the module powered on, note the active alarms, and carefully disconnect the field cables from the terminal block while leaving the module-side wiring fully intact.
  • Step 2: Monitor System Alarms: Check the DCS diagnostic screen immediately. If the “Module Missing” or “Bad Quality” alarm vanishes instantly, an external field device or field cable is introducing the interference.
  • Step 3: Measure Ground Voltages: Use a high-impedance digital multimeter to measure the voltage between the signal common (COM) line, the cable shield, and the chassis ground.
Measured VoltageRisk AssessmentRecommended Action
< 0.5VNormal ConditionInvestigate backplane or module internal logic.
0.5V to 2.0VLow to Moderate RiskInspect shield connections and look for minor leaks.
> 2.0VHigh RiskIsolate long-distance loops; fix grounding networks.
> 5.0VSevere InterferenceImmediate mitigation required to stop Bad Quality errors.

Best Practices for Cable Shielding and Grounding Compliance

A frequent installation mistake in industrial plants is grounding cable shields at both ends. Dual-point grounding creates a closed-loop path for ground circulating currents, which injects severe noise into the digital lines.

To align with modern IEC 61000 electromagnetic compatibility standards, technicians must enforce a single-point grounding strategy. Always connect the shield wire at the DCS cabinet side and isolate it at the field instrument side. For high-noise environments near large compressors or electrolytic cells, adding interposing optocoupler relays or surge protective devices (SPDs) creates a reliable buffer that completely protects the DCS I/O subsystem.

Powergear X Automation Technical Insight and Analysis

At Powergear X Automation, our engineering analysis shows that over 80% of intermittent digital I/O faults in aged control systems stem from deteriorating grounding grids rather than component failure. As processing plants expand over decades, localized soil resistivity shifts and structural modifications create unseen ground loops.

Rather than treating the symptoms by continuously replacing inventory, engineers should treat the root cause by fortifying instrument ground integrity. When sourcing replacement modules or updating system architectures, working with an experienced automation partner ensures that your hardware configurations match original engineering parameters while mitigating modern electromagnetic risks.

Industrial Automation Application Scenarios

  • Scenario A: Long-Distance Pump Stations: Digital inputs traveling over several hundred meters from remote tank farms often carry severe ground potential shifts. Interposing relays installed at the terminal block decouple these lines effectively.
  • Scenario B: VFD Induced Noise: High-power chemical mixing pumps utilizing variable frequency drives generate intense high-frequency radiation. Single-point shielding on the SPDSI14 input lines stops false signal chattering.

Frequently Asked Questions (FAQs)

  • Q1: Can a faulty field power supply simulate a “Module Missing” error?
    Yes. If a field short-circuit pulls down the auxiliary power distribution line shared near the module reference, the internal communication bus might experience voltage sags, leading the controller to flag the entire module as missing.
  • Q2: Are different hardware revisions of SPDSI14 fully backward compatible?
    While basic signaling remains compatible, differing hardware revisions feature varied diagnostic tolerances. Always verify your current DCS firmware version and cabinet configuration file before hot-swapping modules.
  • Q3: Why does restarting the module temporarily clear a “Bad Quality” alarm?
    Restarting flushes the module’s internal error counters and resets the communication register. If the external ground voltage interference remains active, the error counters will accumulate data packets again, and the alarm will reappear.

Looking for Reliable Automation Components?

If you need high-quality, fully tested replacement parts or expert system support to keep your operations running smoothly, check out the extensive inventory of premium control system hardware available at Powergear X Automation.

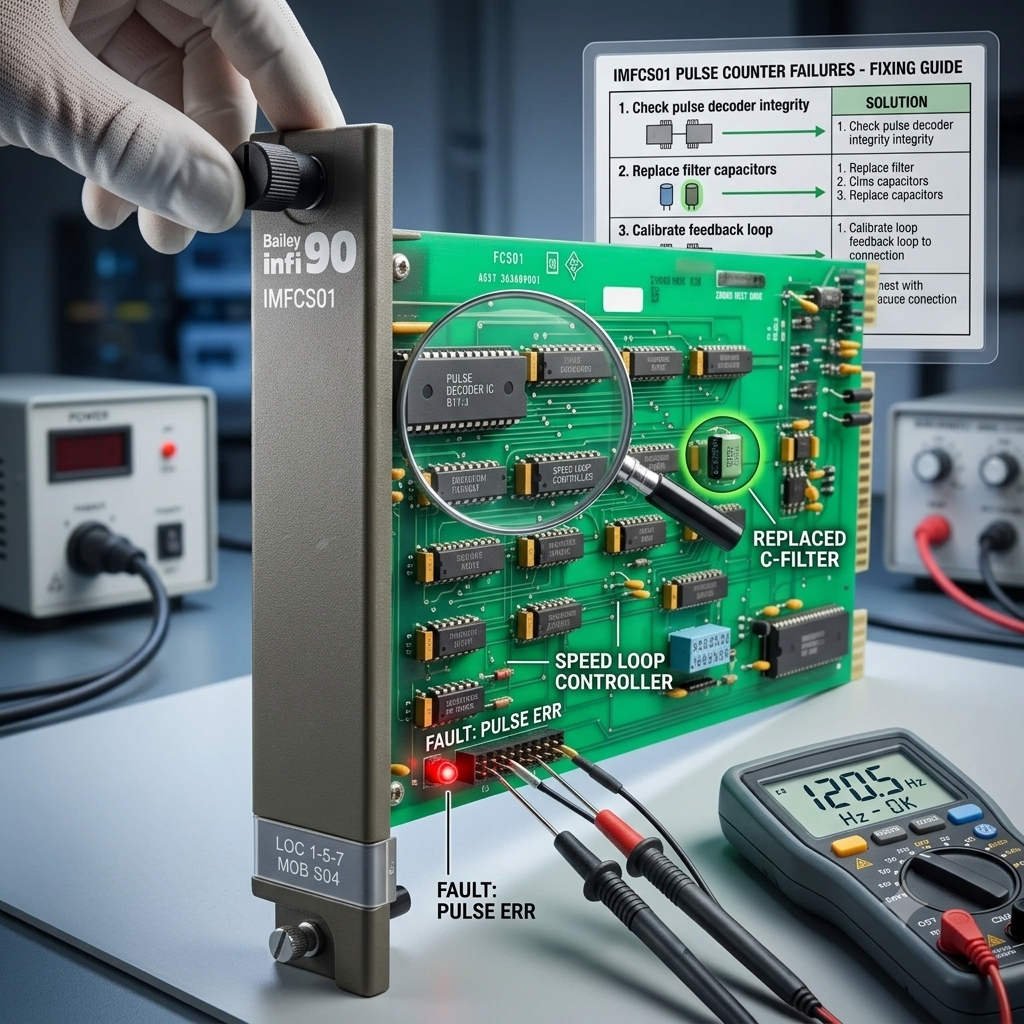
Fixing IMFCS01 Pulse Counter Failures in Turbine Speed Loops

Resolving IMFCS01 Pulse Counting Failures in Steam Turbine Speed Control Systems

Reliable speed measurement remains a critical pillar of turbomachinery protection and load control within industrial automation. In distributed control systems (DCS), the ABB Bailey INFI 90 / Symphony series IMFCS01 Frequency Counter Module plays a vital role. This module frequently conditions and counts pulse signals generated by proximity probes and preamplifiers (Proximitors). However, engineers often encounter a frustrating scenario during commissioning or post-overhaul restarts. The Proximitor functions correctly, and signal cables show excellent continuity, yet the IMFCS01 module registers a wheel speed of zero RPM. This comprehensive guide diagnoses this common field issue and offers actionable technical solutions.

Understanding Why the IMFCS01 Fails to Capture Turbine Pulse Signals

A typical steam turbine speed measurement loop routes a proximity probe through a Proximitor to output pulses directly into the IMFCS01 module. Many control room technicians overlook the fundamental operation of the hardware. The IMFCS01 does not directly read raw frequency. Instead, internal comparator circuits must detect a pulse crossing a predefined voltage threshold before registering a count. If field personnel misconfigure this threshold higher than the actual peak voltage of the incoming wave, the card remains blind to the pulse edges. Industrial facilities frequently experience this issue after turbine overhauls, sensor replacements, or when splitting speed loops to feed third-party vibration monitoring systems like Bently Nevada 3500 racks.

Consider the following signal interaction matrix based on real-world field data:

Preamplifier Output (Vpp)IMFCS01 Threshold SettingCounting StatusOperational Outcome
2.5V Pulse5V (Mid Threshold)No CountingZero RPM Reading / False Trip Hazard
8.0V Pulse5V (Mid Threshold)Normal CountingStable Speed Control
12.0V Pulse10V (High Threshold)Normal CountingStable Speed Control
3.0V Pulse10V (High Threshold)No CountingDCS Speed Signal Loss Fault

The Critical Role of Threshold Configuration in Rotating Machinery Protection

The primary value of the IMFCS01 lies in providing high-integrity speed processing for safety-critical control systems. In petrochemical plants, power generation facilities, and gas pipelines, sudden speed signal loss triggers devastating consequences. For example, according to API 670 standards for machinery protection, a loss of speed feedback can cause emergency overspeed trip valves to close unexpectedly. Consequently, these nuisance trips result in massive financial losses due to unplanned production downtime. Properly managing input sensitivity via physical hardware jumpers significantly improves signal-to-noise ratios, especially when processing attenuated signals across long field cable runs.

Step-by-Step Procedure to Adjust the IMFCS01 Threshold Jumper

While minor board variations exist across different manufacturing generations of the Bailey INFI 90 hardware, most modules utilize a standardized jumper layout. Technicians should execute the following steps to ensure precise calibration:

Step 1: Measure the Actual Pulse Amplitude
Connect an isolated, calibrated digital oscilloscope directly to the terminal block of the speed input channel. Do not rely solely on a digital multimeter, as multimeters average out the voltage. Record the peak-to-peak voltage (Vpp), the low state voltage, and the wave shape. For example, if a probe yields a 0V low state and a 4.2V high state at 3,000 Hz, the effective pulse peak is 4.2V.

Step 2: Inspect the Hardware Jumper Configuration
Isolate the loop power and safely extract the IMFCS01 card from its module mounting slot. Locate the hardware jumpers on the printed circuit board (PCB), typically labeled as JP1, JP2, JP3, or designated under a “Threshold Select” silk screen. Review the standard voltage matrix:

  • LOW Position: Activates a 1V to 2V threshold for low-voltage pulses.
  • MID Position: Establishes a nominal 5V threshold for standard industrial logic.
  • HIGH Position: Sets a 10V threshold designed for high-amplitude signals.

Step 3: Apply the 40% to 60% Field Engineering Rule
As a rule of thumb gained from decades of plant maintenance, always configure the threshold to sit between 40% and 60% of the true pulse peak voltage. If the measured pulse peak is 4.2V, the 10V high setting will fail entirely. Therefore, move the jumper to the LOW threshold position (1-2V) to guarantee robust triggering across all turbine operational speeds.

Step 4: Re-energize and Verify Control Loops
Reinsert the module, power up the rack, and monitor the DCS graphics. Verify the RPM display, check the Sequence of Events (SOE) logs for chatter, and trend the speed variable. If the speed curve remains flat and free of noise spikes, the threshold is correct.

Technical Specifications and Environmental Challenges

Managing turbine speed inputs requires balancing three key engineering parameters:

  • Input Edge Detection: Setting the threshold too high causes dropped counts, while setting it too low invites high-frequency noise interference. Engineers must adapt these settings when field cables exceed 100 meters, as cable capacitance degrades signal amplitude by up to 30%.
  • Maximum Frequency Limits: Consider a 60-tooth speed wheel spinning at 10,000 RPM. The input frequency reaches exactly 10,000 Hz ($10,000 \times 60 \div 60 = 10,000\text{ Hz}$). If this approach nears the upper processing limits of your I/O card, it introduces processing lag and timing errors into overspeed protection logic.
  • Galvanic Isolation: Turbine decks contain severe electromagnetic interference (EMI) from high-voltage generators, exciters, and variable frequency drives (VFDs). The integrated opto-isolation on the IMFCS01 protects internal logic from common-mode voltage spikes and reduces false overspeed trips.

Best Practices for Field Installation and Maintenance

🔧 Quick Field Checklist for Speed Loops:
1. Always routing speed signal cables through dedicated, grounded galvanized conduits.
2. Maintain a minimum 30cm separation between pulse signal lines and high-voltage AC cables.
3. Ensure the overall cable shield is grounded at a single point, preferably at the DCS cabinet ground bus.

Furthermore, plants located in areas prone to lightning must install dedicated signal surge protective devices (SPDs) on the DIN rail before the signal enters the IMFCS01 card. This prevents induced high-voltage transients from burning out the delicate comparator circuits inside the module.

An Expert Commentary from Powergear X Automation

From our perspective at Powergear X Automation, many control system issues blamed on “dead I/O cards” actually stem from simple configuration oversights. As legacy control systems interface with modern instrumentation, voltage mismatches occur more frequently. When upgrading or maintaining critical infrastructure, ensuring proper impedance and threshold matching saves hundreds of hours of troubleshooting. If you require verified, high-reliability replacement parts or upgraded modules for your legacy control systems, explore the fully tested inventory available at Powergear X Automation to secure your plant’s operational uptime.

Real-World Application Scenario

During a recent turnkey upgrade at a combined-cycle power plant, the plant replaced an old mechanical overspeed governor with a triple-modular redundant electronic system. Technicians routed the secondary speed pulses into an existing Bailey INFI 90 DCS running an IMFCS01 card. Upon startup, the DCS showed zero RPM, instantly triggering a start-failure lock. While the team initially suspected a faulty module, an oscilloscope check revealed that the new sensor only outputted a 3.8V peak signal because of an added safety barrier line resistance. The IMFCS01 jumper was set to the default MID (5V) position. Moving the jumper to the LOW position resolved the issue instantly, allowing the plant to synchronize to the grid on schedule.

Frequently Asked Questions (FAQs)

Q1: Does a flat-line zero RPM reading on the IMFCS01 mean the module must be replaced?
No, a zero reading rarely indicates immediate hardware failure if the card status LEDs are normal. Most incidents stem from incorrect threshold jumper settings, oxidized terminal connections, or signal attenuation caused by long field wiring. Always check the pulse waveform with an oscilloscope before purchasing replacements.

Q2: Can the IMFCS01 handle direct TTL signals from modern digital encoders?
Yes, provided the TTL signal voltage levels cross the configured threshold. Since standard TTL high states sit around 5V, the MID or LOW threshold jumper settings must be verified on the card to ensure the module registers the rising and falling edges accurately.

Q3: How does cable length affect the threshold settings on frequency counter modules?
Longer cables increase total loop resistance and capacitance, which rounds off the sharp edges of square waves and reduces the peak voltage. A pulse that leaves a Proximitor at 5V might arrive at the control cabinet at 3.2V. In these cases, technicians must lower the threshold jumper to compensate for this signal degradation.

Preventing Industrial EMI CC-TDI110 Installation Best Practices_

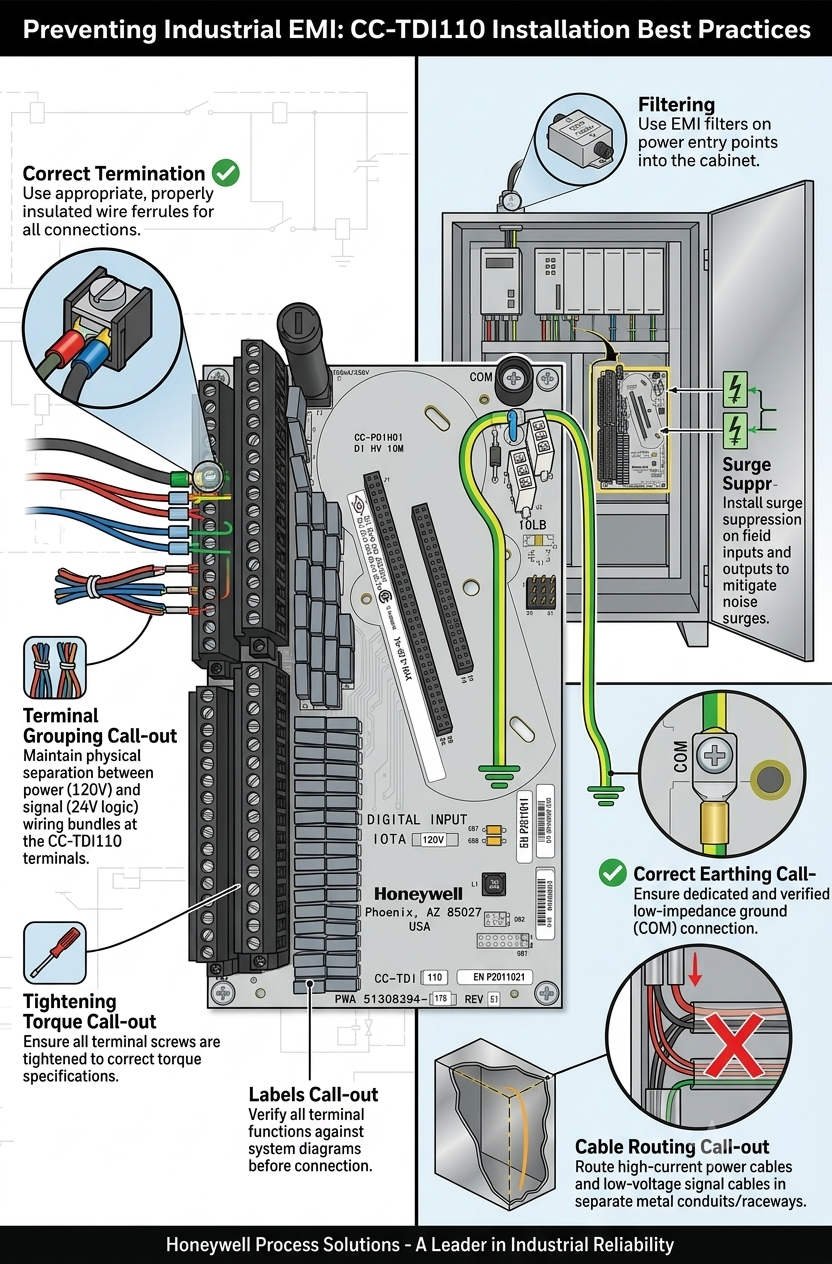
Preventing Industrial EMI: CC-TDI110 Installation Best Practices

Maximizing Signal Reliability with the Honeywell CC-TDI110 Digital Input Module

The Core Role of Digital Inputs in DCS Reliability

Modern industrial automation relies on precise data acquisition from field devices to the Distributed Control System (DCS). The Honeywell CC-TDI110 Digital Input Module serves as a critical bridge in this communication chain. Specifically, it excels in high-power environments like petrochemical plants and heavy manufacturing lines. Maintaining signal integrity is paramount in these settings. Consequently, engineers must prioritize proper shielding to prevent costly false trips or missed alarms.

Preventing Industrial EMI CC-TDI110 Installation Best Practices_

Preventing Industrial EMI CC-TDI110 Installation Best Practices_

Enhancing Isolation Against Electromagnetic Interference

The CC-TDI110 features robust channel-to-channel and channel-to-ground isolation. This design allows the module to detect digital states accurately despite nearby high-voltage cables. However, isolation alone cannot solve all noise problems. Electrical noise often originates from poor cable routing rather than internal component failure. Therefore, system integrators should treat internal isolation as a secondary defense rather than a primary solution.

Managing Common-Mode Noise in VFD Environments

Industrial facilities frequently utilize large motors and Variable Frequency Drives (VFDs). These devices generate significant Common-Mode Interference that can overwhelm standard control systems. The CC-TDI110 offers a high tolerance to this noise, ensuring stable performance. Nevertheless, if signal cables sit too close to power lines, induced voltages might exceed these rejection thresholds. Reliable factory automation requires a strict physical separation between signal and power conductors.

Advanced Input Filtering and Debounce Mechanisms

Transient noise can trigger nuisance alarms if a module lacks proper filtering. The CC-TDI110 addresses this through configurable debounce times that suppress short-lived electrical spikes. While these filters improve stability, they are not a cure for chronic interference. Excessive noise persisting beyond the filter window can still cause unintended shutdowns. As a result, Powergear X Automation recommends validating filter settings during the commissioning phase.

Best Practices for Shielded Cable Installation

Proper installation is the foundation of long-term system stability. When routing signals near motor feeders or lines exceeding 220V AC, always use shielded twisted-pair cables. Maintain at least 300 mm of clearance according to IEC 61000-5-2 guidelines. Furthermore, ensure any unavoidable crossings occur at a 90-degree angle. This technique effectively minimizes inductive coupling and preserves the purity of the digital signal.

Critical Shield Grounding and Segregation Strategies

A frequent mistake in the field involves grounding cable shields at both ends. This creates ground loops that introduce more noise into the system. For the CC-TDI110, engineers should ground the shield only at the DCS cabinet. Additionally, never share cable trays between high-current power lines and sensitive signal wires. We have observed cases where segregating cables into dedicated metallic trays instantly resolved intermittent DI flickering.

Strategic Insights from Powergear X Automation

In our experience at Powergear X Automation, hardware quality is only half the battle. The CC-TDI110 is a world-class module, but its performance depends on the surrounding infrastructure. We recommend a “holistic shielding” approach that combines high-quality Honeywell hardware with strict adherence to IEC standards. Investing in proper wiring today prevents expensive downtime in the future.

Technical Summary Checklist

  • Use shielded twisted-pair cables for all digital inputs.
  • Ground shields at the DCS side only to prevent loops.
  • Maintain 300 mm separation from high-power cables.
  • Configure debounce times to match field device characteristics.
  • Install Surge Protection Devices (SPD) in lightning-prone areas.

Practical Application Scenarios

  • Refinery Safety Interlocks: Ensuring emergency shutdown valves report status without EMI-induced false positives.
  • Power Plant Turbine Control: Monitoring high-speed digital states near heavy electrical switching equipment.
  • Chemical Batch Processing: Maintaining accurate sequence control where VFDs are used extensively for agitation.

Expert FAQ: CC-TDI110 Implementation

Q1: How do I choose between the CC-TDI110 and legacy Honeywell DI modules?
Evaluate your current electromagnetic environment first. While the CC-TDI110 is often backward compatible, it offers superior noise rejection features necessary for modern VFD-heavy plants. If your facility has upgraded its power hardware, upgrading your I/O modules is a wise technical move.

Q2: What is the most common cause of “flickering” signals in new installations?
Usually, it is a grounding issue. Ensure your shields are not creating loops and check for 90-degree crossings at power intersections. If the issue persists, increase the software debounce time slightly within the DCS configuration.

Q3: Does this module require specialized maintenance during its lifecycle?
The CC-TDI110 is largely maintenance-free. However, we recommend annual inspections of the terminal blocks and grounding bars. Loose connections are a silent killer of signal integrity in high-vibration industrial settings.

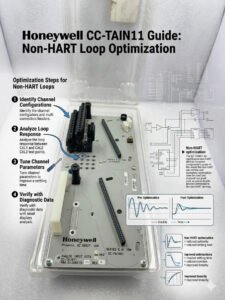
Honeywell CC-TAIN11 Guide Non-HART Loop Optimization

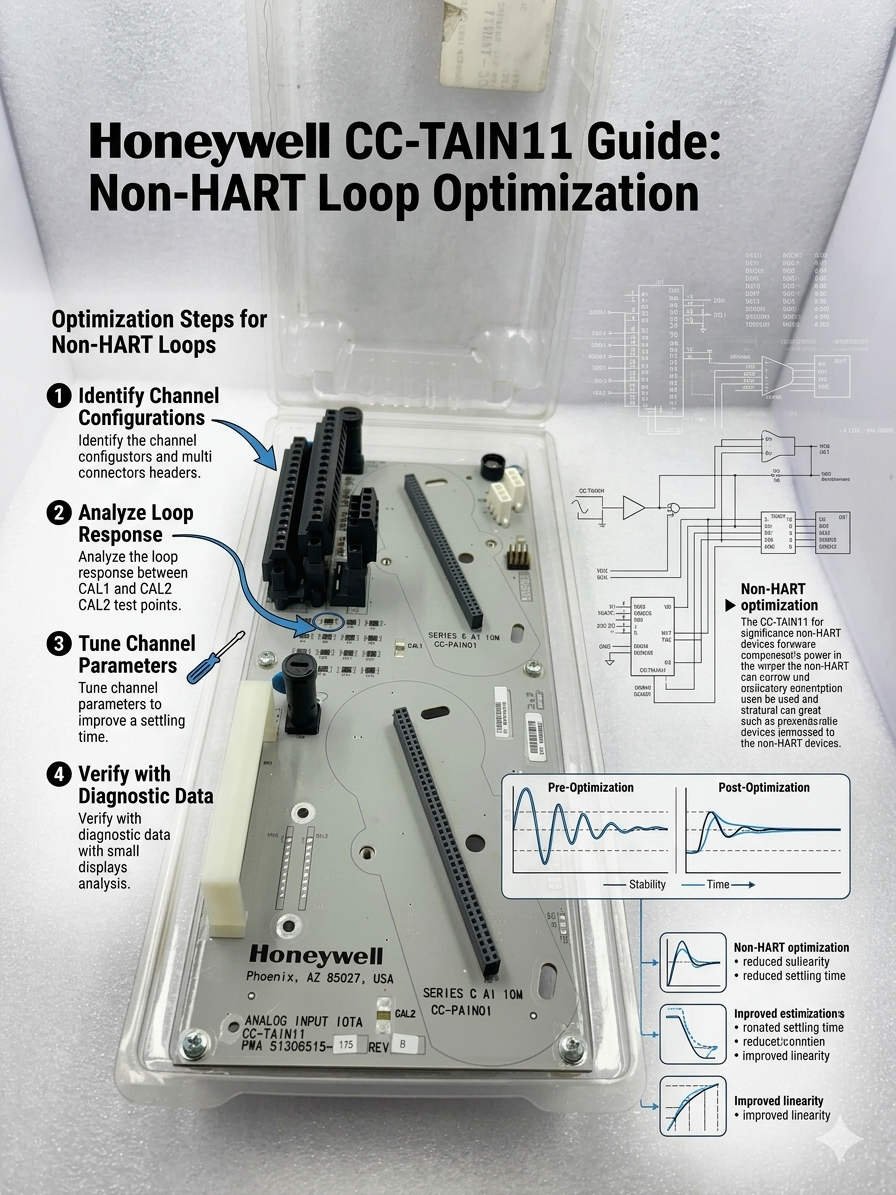
Honeywell CC-TAIN11 Guide: Non-HART Loop Optimization

Optimizing Honeywell CC-TAIN11 Performance for Non-HART Analog Loops

The Role of CC-TAIN11 in Modern DCS Architecture

The Honeywell CC-TAIN11 base provides essential termination for analog signals within Distributed Control Systems (DCS). It ensures stable data transmission for critical processes in the petrochemical and pharmaceutical sectors. However, engineers often face challenges when integrating non-HART field instruments. Maintaining 4–20 mA signal integrity remains the top priority for system reliability. Improper termination frequently leads to signal drift or control loop instability during high-demand operations.

Honeywell CC-TAIN11 Guide Non-HART Loop Optimization

Honeywell CC-TAIN11 Guide Non-HART Loop Optimization

Understanding HART vs. Non-HART Signal Requirements

Standard HART-enabled loops require a 250 Ω resistance to support digital communication over analog signals. For non-HART instruments, this digital layer does not exist. Adding an extra resistor in these cases is usually unnecessary. Moreover, redundant resistors increase the voltage drop across the circuit. This may reduce the overall accuracy of your factory automation sensors. Therefore, you must verify the input impedance of your AI module before modifying the hardware.

Managing Loop Resistance and Signal Saturation

Every 4–20 mA loop has a maximum load capacity, typically between 500 Ω and 750 Ω. If the total resistance exceeds the transmitter’s limit, the signal may saturate at high current levels. This saturation causes incorrect process readings during peak flow or pressure conditions. As a result, critical safety systems might fail to trigger appropriately. Always calculate the total budget of your loop resistance to ensure linear performance across the entire range.

Redundancy in Honeywell AI Module Design

Most modern Honeywell analog input modules already include precision internal resistors. These components handle the current-to-voltage conversion internally. Consequently, adding external resistors to the CC-TAIN11 is often redundant for standard transmitters. While legacy systems might require impedance matching, modern DCS platforms simplify this process. We recommend checking the specific technical manual for your AI module to confirm its internal configuration.

Best Practices for Field Commissioning and Maintenance

Success in the field requires a methodical approach to loop validation. Powergear X Automation suggests following these technical steps to ensure peak performance:

  • ✅ Use a calibrated multimeter to measure total loop resistance.
  • ✅ Verify the compliance voltage of the field transmitter.
  • ✅ Ensure single-point grounding to prevent EMI-induced fluctuations.
  • ✅ Inspect shield continuity for cable runs exceeding 300 meters.
  • ✅ Confirm the AI module impedance before adding any hardware.

Strategic Insights from Powergear X Automation

Our team at Powergear X Automation observes that 90% of signal issues stem from over-engineering. Many technicians add resistors by default without performing loop calculations. This habit often creates “ghost” faults that are difficult to diagnose later. We believe that a leaner, data-driven installation approach improves long-term stability. Always prioritize the manufacturer’s loop diagrams over generic field assumptions.

Practical Solution Scenarios

  • Refinery Long-Distance Loops: Minimizing resistance in 500m runs to prevent transmitter power failure.
  • Pharmaceutical Batch Control: Ensuring high-precision 4-20mA feedback without digital noise interference.
  • Heavy Industrial EMI Zones: Utilizing the CC-TAIN11 with robust shielding to protect sensitive analog data.

Expert FAQ: CC-TAIN11 Implementation

Q1: Will adding a 250 Ω resistor improve signal stability for non-HART devices?
Actually, it usually does the opposite. If your AI module already has an internal resistor, adding another one creates a parallel or series load that distorts the signal. Only add a resistor if your specific receiving equipment lacks an internal 250 Ω impedance.

Q2: How do I identify a “saturated” loop during plant startup?
Watch for signals that “flat-line” at roughly 18-19 mA even when process conditions increase. This typically indicates that the transmitter cannot push enough voltage through the high loop resistance. Removing unnecessary resistors on the CC-TAIN11 often fixes this immediately.

Q3: Can I use the CC-TAIN11 for third-party PLC integration?
Yes, but you must validate the wiring topology. Third-party PLCs often have different input impedances than Honeywell systems. Always perform a Loop Check (FAT) to ensure the 4-20mA scaling matches between the field device and the controller.

For high-quality components and expert technical support, visit the Powergear X Automation website for all your industrial automation needs.

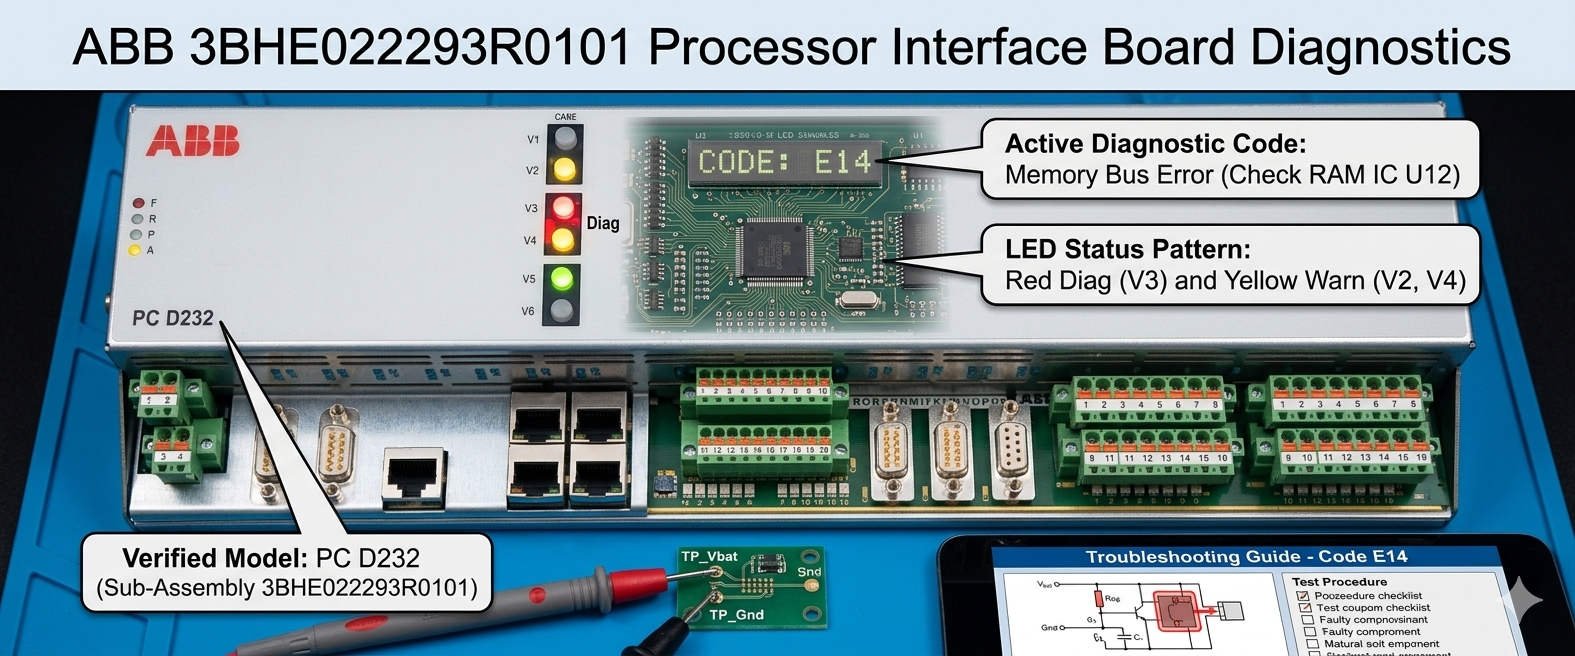
ABB 3BHE022293R0101 Processor Interface Board Diagnostics

ABB 3BHE022293R0101 Processor Interface Board Diagnostics

Diagnosing a Dead ABB PC D232 3BHE022293R0101: How to Verify Backplane Power Supply

In heavy industrial automation, a sudden hardware failure can stall an entire production line. The ABB PC D232 (part number 3BHE022293R0101) processor interface board is a critical component in excitation control and DCS environments. However, engineers often face a frustrating scenario: the board shows no LED indicators after power-on. Fortunately, this symptom does not always mean the board is dead. It frequently points to a failure in the backplane power distribution network instead.

ABB 3BHE022293R0101 Processor Interface Board Diagnostics

ABB 3BHE022293R0101 Processor Interface Board Diagnostics

The Critical Role of the 3BHE022293R0101 Interface Board

The PC D232 serves as the primary communication link between high-level controllers and field equipment. It manages boot-up sequencing and synchronizes rapid data transfers within the cabinet. In sectors like power generation and petrochemical processing, this module ensures absolute operational stability. Because it handles vital processor interface tasks, any degradation in power will cause a complete communication freeze. As a result, maintaining a steady voltage supply is essential for total system availability.

Analyzing the Technical Principles of the 5V Logic Supply

The 5V DC rail provides the essential logic power for core microprocessors, FPGAs, and communication chips. For optimal performance, this rail must remain within a strict tolerance of 4.75V to 5.25V. If the voltage drops below this range, the CPU cannot execute its boot sequence. Consequently, the board will show no LED activity whatsoever. In older cabinets, power supply unit (PSU) capacitor degradation is the leading cause of excessive voltage ripple. High ambient temperatures accelerate this aging process, creating intermittent startup faults under full load slots.

Understanding 24V Distribution and Safety Interlock Chains

While the 5V rail powers internal logic, the 24V DC rail controls interface relays and permissive enable circuits. Industrial control systems usually expect a 24V supply to stay within 21.6V and 26.4V. In turbine excitation applications, the system routes this voltage through physical safety chains. If a cabinet door switch or safety relay opens, the board loses power completely. Therefore, engineers must trace the entire safety interlock before condemning the microprocessor card. A loose terminal fuse can easily mimic a total hardware failure.

Mechanical Reliability of Backplane DIN Connectors

Mechanical wear remains a hidden source of electronic component failure in factory automation. The PC D232 relies on high pin-density DIN connectors to connect with the backplane. In high-humidity or coastal chemical environments, these pins are highly vulnerable to oxidation. This chemical film increases contact resistance, blocking low-voltage power from entering the PCB. Often, simply re-seating the card restores operation temporarily. This behavior confirms a mechanical connectivity issue rather than a genuine component failure inside the board circuitry.

Step-by-Step Power Verification for Field Engineers

  • Verify Cabinet Input: Confirm that the main AC power feeding the redundant PSU modules is completely normal.
  • ⚙️ Measure the 24V Rail: Use a digital multimeter across the 0V COM and the fuse holder output terminal.
  • 🔧 Test the 5V Logic: Check test points while the module is seated to measure actual slot load conditions.

Strategic Selection and Backward Compatibility Rules

When procuring a replacement module, buyers must remember that physical appearance can be highly deceiving. Different revisions of the PC D232 might look identical but carry completely different firmware packages. Mixing incompatible board revisions can lock up the system bus upon power-on. Moreover, older backplanes might not support the advanced diagnostic features of newer card iterations. Therefore, always match the model with your original Bill of Materials (BOM) and check active system lifecycles.

Expert Advisory from Powergear X Automation Limited

At Powergear X Automation Limited, our field experience shows that nearly 40% of returned processor boards are fully functional. In reality, bad grounding bars and weak power supplies cause the majority of field diagnostic alarms. We strongly recommend that site teams implement a formal lock-out tag-out (LOTO) procedure before testing. Furthermore, avoid hot-swapping these modules unless your specific cabinet manual explicitly permits it. To source certified, reliable parts and upgrade legacy components, visit our store at https://www.powergearx.com/.

Real-World Application and Scenario Planning

In a large hydroelectric power plant, an excitation cabinet failure can halt electricity generation instantly. During a recent maintenance outage, a technician found a PC D232 board with no active status lights. Instead of executing an emergency replacement, the engineer systematically checked the backplane test nodes. The multimeter revealed a 5V logic rail reading of only 4.2V. The team replaced the aging DIN-rail PSU, instantly restoring the system without touching the expensive processor board hardware.

Frequently Asked Questions (FAQ)

1. Why shouldn’t I measure the 5V logic rail with the processor board pulled out?
Many industrial backplanes use switching regulators that require a minimum circuit load to function correctly. Measuring an empty slot can give false voltage readings that disappear once you insert the heavy board.

2. Can external voltage surges cause the board’s LEDs to turn off permanently?
Yes. High-current motor starters and VFD switching can send transient voltage spikes through unprotected lines. These spikes fry the internal DC/DC converter on the board, disabling all diagnostic LEDs.

3. What safe cleaner should we use if we discover oxidized backplane contacts?
Always use a fast-evaporating, manufacturer-approved electronic contact cleaner. Ensure the cabinet is completely de-energized before spraying, and allow the pins to dry fully before re-inserting the interface board.

Back to Top
Product has been added to your cart