Over 50,000 hot-selling automation module components.
170ENT11001 vs 170ENT11002 Modicon Momentum Guide

Schneider 170ENT11002 Review: High-Performance Industrial Ethernet

Strategic Value of Modicon Momentum Ethernet Modules

Choosing between the Schneider Electric 170ENT11001 and the 170ENT11002 is a critical decision for engineers managing Modicon Momentum platforms. While both modules provide essential Ethernet connectivity, their performance profiles differ significantly in modern industrial environments. This guide, prepared by Powergear X Automation, breaks down the technical nuances to help you optimize your plant-floor communication.

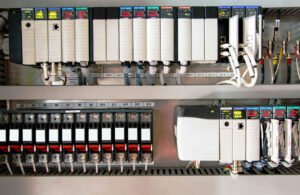
The Schneider Electric 170ENT11001 and 170ENT11002 serve as the primary gateway for Modicon Momentum PLCs to enter the Ethernet TCP/IP ecosystem. These modules provide deterministic communication across various sectors, including oil and gas skids and chemical process units. Their core value lies in bridging the gap between field-level control and plant-wide data monitoring.

170ENT11001 vs 170ENT11002 Modicon Momentum Guide

Ethernet Speed and Network Evolution

The 170ENT11001 supports a fixed 10 Mbps Ethernet speed, which remains adequate for legacy, isolated networks. In contrast, the 170ENT11002 offers 10/100 Mbps Fast Ethernet with auto-negotiation capabilities. Modern plants utilizing VLANs and managed switches often experience bottlenecks at 10 Mbps. Consequently, the 170ENT11002 handles high-traffic volumes more effectively, reducing communication jitter during heavy SCADA polling.

Boosting Communication Response and Stability

Internal processing power distinguishes these two modules during peak operation. The 170ENT11002 features superior buffering, allowing it to manage multiple concurrent Modbus TCP requests from HMIs and historians. In our experience at Powergear X Automation, the 170ENT11001 may trigger intermittent timeouts when several clients access data simultaneously. Therefore, the 11002 is the preferred choice for batching systems in the pharmaceutical industry.

Reliable Diagnostics and System Maintenance

Maintenance teams favor the 170ENT11002 for its seamless integration with contemporary diagnostic tools. It demonstrates better tolerance for modern managed switches compared to its predecessor. A common commissioning pitfall involves the 170ENT11001 struggling with duplex mismatches on high-end switches. By adopting the 11002, engineers can isolate faults faster and minimize “link up but no data” scenarios.

Expert Tips for Field Installation

Proper installation determines the longevity of your communication hardware. Based on industry standards and field observations, we recommend the following technical practices:

Configure Switch Ports: Lock switch ports to 10 Mbps when using the 170ENT11001.

Implement Surge Protection: Use industrial Ethernet surge protectors for outdoor installations.

Ensure Proper Grounding: Bond the Momentum base to a low-impedance ground point.

Mechanical Security: Install DIN rail end stops to prevent vibration-induced disconnects.

Cable Management: Use shielded cables to mitigate electromagnetic interference in high-voltage cabinets.

Strategic Comparison Summary

Feature170ENT11001170ENT11002Data Rate10 Mbps10/100 Mbps (Auto)Network TypeLegacy/IsolatedModern/High-TrafficMulti-Client SupportLimitedHighBest ApplicationSimple Pump StationsComplex Chemical Plants

Author Insights by Powergear X Automation

At Powergear X Automation, we observe a clear trend toward high-bandwidth industrial Ethernet. While the 170ENT11001 is a reliable “workhorse,” the 170ENT11002 is a “future-proof” necessity. As IIoT and Big Data integration accelerate, the 100 Mbps capability becomes non-negotiable for real-time analytics. We advise clients to audit their existing switch infrastructure before selecting a module to ensure full compatibility.

For expert procurement advice and genuine Schneider Electric components, visit Powergear X Automation.

Application Scenarios and Solutions

Scenario A: Remote Water Treatment: An isolated site with one HMI. The 170ENT11001 provides a cost-effective, stable solution here.

Scenario B: Pharmaceutical Batching: High data integrity and rapid alarm response are required. The 170ENT11002 ensures recipe execution remains precise and stable.

Scenario C: Factory Migration: Upgrading from unmanaged to managed switches. The 170ENT11002 prevents the “duplex mismatch” issues common in older hardware.

Frequently Asked Questions (FAQ)

Q1: How do I choose between these modules for a high-vibration environment?

Both modules share the same mechanical housing, but the connection stability depends on your wiring. We suggest using high-quality RJ45 connectors with strain relief. The 170ENT11002 is better if the vibration source also generates electrical noise, as its faster processing handles retries more efficiently.

Q2: Will I need to rewrite my PLC logic if I swap an 11001 for an 11002?

No, they are functionally compatible at the application layer. However, you should verify your software configuration in Unity Pro or Concept. Always ensure the “Module Type” in your hardware configuration matches the physical hardware installed to avoid I/O health errors.

Q3: Is the 170ENT11001 still a viable purchase today?

It is viable for maintaining existing legacy systems where network changes are not planned. However, for any new project or network expansion, we strongly recommend the 170ENT11002. The price difference is often offset by the reduction in troubleshooting time and improved network performance.

Schneider Quantum PLC Watchdog Fault: Adjustment Best Practices

Schneider Quantum PLC Watchdog Fault: Adjustment Best Practices

Understanding the Logic Behind PLC Scan and Watchdog Limits

Managing a Schneider Electric Quantum PLC requires a deep understanding of its protective mechanisms. The software watchdog acts as a critical fail-safe, halting the CPU if the scan cycle exceeds a defined limit. In sectors like oil and gas or chemical processing, an unoptimized watchdog can cause catastrophic downtime. Therefore, engineers must balance system responsiveness with operational stability to maintain high industrial automation standards.

The watchdog timer monitors the time the CPU takes to complete one full logic cycle. If complex calculations or heavy communication tasks delay the cycle, the PLC triggers a “Watchdog Fault” and enters STOP mode. Consequently, this prevents the controller from executing stale logic or losing control of the process.

Most control systems experience increased scan times due to:

Large-scale PID loop execution.

Extensive Ethernet I/O scanning via Modbus/TCP.

Legacy code structures that lack optimization.

Schneider Quantum PLC Watchdog Fault: Adjustment Best Practices

How to Configure Watchdog Settings in Control Expert

To adjust the watchdog time, you must use EcoStruxure Control Expert (formerly Unity Pro). Navigate to the PLC Configuration and locate the “General” tab under “Properties.” Here, you can define the Watchdog Time in milliseconds.

Practical Configuration Steps:

Monitor the maximum scan time during full production load.

Set the watchdog value to 1.5 or 2 times the maximum scan duration.

Verify the changes in a simulation environment before deploying to live hardware.

The Impact of Communication Loads on CPU Performance

In my experience at Powergear X Automation, we often find that “ghost” watchdog faults stem from network saturation. High-frequency SCADA polling or unmanaged Modbus requests consume CPU resources. Instead of simply increasing the watchdog timer, engineers should prioritize optimizing the communication task load. Moreover, balancing the “Communication vs. Logic” ratio in the CPU settings often resolves stability issues without compromising safety.

Strategic Solutions for Reducing Scan Time Peaks

Relying on a longer watchdog timer is often a temporary “band-aid” for underlying logic inefficiencies. To achieve true factory automation excellence, you should restructure the program.

Move non-critical logic to periodic or event-driven tasks.

Use specialized function blocks to handle complex math more efficiently.

Segment large networks into smaller, manageable sub-routines.

Engineering Best Practices for System Maintenance

✅ Technical Optimization Checklist:

Always record baseline scan times before making software changes.

Evaluate CPU utilization after adding any new remote I/O modules.

Ensure the latest firmware version is installed to improve processing efficiency.

Audit the network topology to reduce Ethernet collisions and delays.

Review IEC 61131-3 compliance for all custom-written logic blocks.

Author’s Perspective: The Powergear X Automation Insight

At Powergear X Automation, we believe the watchdog fault is a diagnostic tool, not just an error. While many technicians immediately increase the timer to stop the tripping, we recommend a deeper dive into the CPU’s diagnostic buffer. Increasing the time might mask a failing communication module or a memory leak. In the world of DCS and high-end PLCs, stability is achieved through efficiency, not by widening the margins for error.

Application Scenario: Chemical Batch Processing

In a chemical plant, a Quantum PLC was experiencing intermittent watchdog trips during the start of a new batch. Our investigation revealed that the simultaneous activation of 50 PID loops caused a massive scan time spike. By transitioning these loops into a periodic task staggered over 100ms intervals, we stabilized the scan time. As a result, the plant avoided unnecessary stops while keeping the watchdog at a conservative, safe limit.

Frequently Asked Questions (FAQ)

Q: How do I choose between upgrading the CPU or tuning the software?

A: If your average scan time consistently exceeds 70% of your watchdog limit even after optimization, the hardware is likely at its physical limit. Upgrading to a higher-spec Quantum or M580 processor is often more cost-effective than risking a process failure.

Q: Can external network security scans cause watchdog faults?

A: Yes. Intensive IT vulnerability scans can overwhelm the Quantum’s Ethernet port. We recommend implementing industrial firewalls to filter non-essential traffic from reaching the PLC backplane.

Q: Is there a specific standard for setting watchdog margins?

A: While there is no “one-size-fits-all” number, industry veterans follow the 50% margin rule. If your peak scan is 50ms, set your watchdog to 75ms-100ms to allow for minor fluctuations without sacrificing rapid fault detection.

For professional hardware support and advanced system integration strategies, visit Powergear X Automation to explore our full range of industrial solutions.

Genius Network Interface IC200GBI001 for Legacy PLC Support

Genius Network Interface IC200GBI001 for Legacy PLC Support

Maximize Legacy System Lifespan with the IC200GBI001 Genius Interface

The IC200GBI001 Genius Network Interface serves as a vital bridge between modern VersaMax I/O and legacy GE control architectures. It specifically solves a major headache in brownfield industrial automation projects. Engineers often struggle to maintain aging systems without committing to a full PLC replacement. This module allows plants to protect their existing investments while adding flexible I/O capabilities.

Genius Network Interface IC200GBI001 for Legacy PLC Support

Seamless Integration with GE Series 90-30 Systems

The IC200GBI001 natively supports the Genius protocol, the backbone of legacy GE 90-30 PLCs. It communicates directly with Genius Bus Controllers, such as the IC693BEM331. This compatibility ensures that your existing control systems remain functional during phased hardware upgrades. Consequently, you can modernize remote I/O hardware while the central CPU stays unchanged.

Deterministic Performance in Factory Automation

Unlike some modern Ethernet protocols, Genius operates as a deterministic, token-passing network. While it lacks the raw speed of Gigabit Ethernet, its scan behavior remains highly predictable. In my experience at Powergear X Automation, network latency rarely hinders performance. The PLC scan cycle typically limits response time, not the interface itself. Therefore, it remains ideal for discrete control and critical process interlocking.

Superior Noise Immunity for Harsh Environments

Industrial settings often suffer from high electromagnetic interference (EMI) from large motors and welders. The IC200GBI001 excels here because the Genius network offers better stability than many early Ethernet implementations. This robust design reduces intermittent I/O faults and maximizes system uptime. It aligns perfectly with IEC standards for factory automation in high-noise zones.

Best Practices for Installation and Grounding

Success with the IC200GBI001 requires precise configuration and physical installation. You must assign a unique Genius Device Number to avoid “I/O not present” alarms. Furthermore, proper grounding is the most critical factor for communication stability. Always ground the cable shield at a single point, usually the PLC side. This prevents ground loops that often plague long cable runs across the plant floor.

  • Verify unique Genius Device addresses before powering up.
  • Use high-quality shielded twisted-pair cabling for all runs.
  • Ground the shield only at the Bus Controller.
  • Maintain a minimum distance from high-voltage power lines.
  • Keep a pre-configured spare module for emergency recovery.

Strategic Insights from Powergear X Automation

At Powergear X Automation, we view the IC200GBI001 as a strategic lifecycle tool. While the industry moves toward Industrial Ethernet, many facilities cannot afford the downtime of a complete migration. This module provides a reliable “middle ground.” It allows for incremental modernization without the risk of a massive system overhaul. However, always plan your long-term migration path while using these legacy-friendly tools.

Application Scenarios

  • Phased Upgrades: Replacing failing legacy I/O blocks with VersaMax modules while keeping the 90-30 CPU.
  • Remote Expansion: Adding new sensors to an existing Genius network without installing new PLC racks.
  • High-EMI Zones: Deploying I/O in areas where standard unshielded Ethernet might fail due to electrical noise.

Expert FAQ

How do I choose between repairing old Genius blocks or buying the IC200GBI001?
Repairing old blocks often leads to recurring failures. The IC200GBI001 is a better investment because it utilizes modern VersaMax hardware. This transition improves reliability and simplifies future part sourcing.

What is the most common mistake during commissioning?
Most engineers forget to check the baud rate. The IC200GBI001 must match the existing network speed (38.4Kbps, 76.8Kbps, or 153.6Kbps). A mismatch will prevent the entire bus from communicating.

Can I use this module to bridge to a third-party PLC?
Directly, no. It requires a Genius Bus Controller. However, if your third-party system has a Genius gateway, communication is possible. Always verify the physical layer compatibility first.

For more technical support and high-quality automation components, visit Powergear X Automation to find the right solution for your facility.

How to Fix VersaMax PLC Fatal Faults Prevent Downtime

How to Fix VersaMax PLC Fatal Faults & Prevent Downtime

How to Diagnose and Resolve GE Fanuc VersaMax PLC Fatal Faults Effectively

The GE Fanuc VersaMax PLC series remains a cornerstone for cost-effective, medium-complexity industrial automation. However, encountering a Fatal Fault can be a daunting experience for maintenance teams. Unlike minor errors, a fatal fault halts the CPU completely. This state prevents the controller from scanning logic or updating I/O, which ensures safety but stops production. At Powergear X Automation, we believe that understanding the root cause is the only way to prevent recurring downtime.

How to Fix VersaMax PLC Fatal Faults Prevent Downtime

Identifying Fatal Fault Codes via CPU Diagnostics

The first step in troubleshooting involves observing the LED indicators on CPUs like the IC200CPU001 or IC200CPU005. A solid FAULT LED typically signals a deep-seated issue, such as corrupted firmware or internal memory parity errors. On the other hand, a flashing LED might indicate a configuration mismatch. Interpreting these signals correctly prevents the common mistake of replacing a perfectly functional CPU when the issue actually lies in the software environment.

Evaluating Power Supply Integrity and Backplane Load

VersaMax systems are notoriously sensitive to backplane voltage fluctuations. When a rack contains numerous relay outputs or analog modules, the power draw can exceed the supply’s capacity. Consequently, a voltage sag during high-load switching can trigger a system-level shutdown. Industry experts recommend calculating the total current draw against the power supply rating to ensure a 20% safety margin, adhering to IEC 61131-2 standards for control systems.

Resolving Firmware and Configuration Incompatibilities

Incompatibility is a leading cause of startup failures in legacy factory automation environments. This often happens when a user downloads a project created in a newer version of Proficy Machine Edition to an older hardware revision. Because the CPU cannot initialize the memory structure, it enters a Fatal Fault state. Therefore, always verify that your hardware revision matches the target settings in your programming software before attempting a download.

Step-by-Step Procedure to Clear System Faults

Restoring a PLC requires a disciplined approach rather than random power cycling. Based on extensive field experience, we recommend this sequence:

  1. Disconnect power from the VersaMax rack entirely.
  2. Extract the CPU module and toggle the Memory Protect switch to OFF.
  3. Reinsert the CPU and restore power to the system.
  4. Use Proficy Machine Edition to execute a Clear All command for logic and configuration.
  5. Perform a final power cycle before reloading your application.

Mitigating External Electrical Stress and Noise

Industrial environments like oil & gas skids or motor control centers often suffer from high electromagnetic interference (EMI). Inductive load spikes from large motors can travel back through the I/O modules, causing the CPU to crash. To prevent this, ensure your DIN rail is properly grounded and your cabinet uses high-quality bonding. Furthermore, installing external surge suppressors can significantly extend the lifespan of your PLC hardware.

Systematic Inspection of I/O Modules

A single improperly seated module can short the backplane and trigger a Fatal Fault. Instead of replacing the CPU immediately, try the “isolation method.” Remove all modules and power up only the CPU. If it stays in RUN mode, reinsert the modules one at a time. This methodical approach quickly identifies the specific unit causing the electrical conflict without wasting capital on unnecessary spares.

Author Insights: The Powergear X Automation Perspective

At Powergear X Automation, we view a Fatal Fault as a vital health check for your system. While these errors are frustrating, they often reveal underlying issues like poor power quality or outdated documentation. As the industry moves toward more integrated DCS and advanced industrial automation solutions, maintaining the integrity of edge controllers like the VersaMax is critical. We recommend keeping a “golden” backup of both the firmware and the logic for every critical PLC to ensure rapid recovery.

For more technical guides and high-quality automation components, visit Powergear X Automation.

Application Scenarios

  • Water Treatment Plants: Use the isolation method to find modules damaged by moisture or corrosion.
  • Chemical Process Units: Monitor backplane voltage to prevent crashes during valve manifold cycling.
  • Manufacturing Lines: Standardize firmware versions across all VersaMax nodes to simplify maintenance.

Technical Maintenance Checklist

  • Verify backplane voltage stays within 5% of nominal levels.
  • Check that the CPU firmware is compatible with the module.
  • Ensure all modules click firmly into the backplane connectors.
  • Clean all gold-plated contacts with an approved electronic cleaner.
  • Confirm the ground wire has a low-resistance path to earth.

Frequently Asked Questions (FAQ)

Q1: How can I tell if my VersaMax CPU is actually “bricked” or just faulted?
If the CPU fails to communicate with Proficy Machine Edition even after a “Clear All” and a power cycle, the internal flash memory may be physically damaged. However, if the software can still see the CPU in “Stop” mode, it is usually recoverable through a firmware re-flash.

Q2: Will a Fatal Fault cause my machine to move unexpectedly?
No. The VersaMax architecture is designed to “fail-safe.” When a fatal error occurs, the CPU stops executing logic and drops all outputs to their de-energized state. This prevents dangerous, uncontrolled movements in the factory automation environment.

Q3: What should I look for when buying a replacement VersaMax CPU?
Always check the hardware revision (e.g., REV A, B, or C) printed on the side label. While newer versions are generally backward compatible, some older backplanes have physical keying or power requirements that might conflict with the latest high-speed CPU models.

GE Fanuc IC200MDL740 A Guide to PLC Module Decoding

GE Fanuc IC200MDL740: A Guide to PLC Module Decoding

Decoding GE Fanuc PLC Model Numbers: How to Identify Input and Output Modules

Navigating the complexities of industrial automation hardware requires precision. For engineers and procurement specialists working with GE Fanuc systems, the model number serves as a technical roadmap. Misidentifying a module can lead to catastrophic hardware failure or prolonged system downtime. This guide breaks down the nomenclature of the VersaMax series, using the IC200MDL740 as a primary case study.

GE Fanuc IC200MDL740 A Guide to PLC Module Decoding

The Anatomy of a GE Fanuc Model Number

Every character in a GE Fanuc model number represents a specific hardware attribute. Typically, the prefix “IC200” identifies the VersaMax family, which remains a staple in factory automation due to its modularity. The following three letters provide the functional classification. At Powergear X Automation, we emphasize that understanding these codes is the fastest way to verify signal flow during the design phase.

Differentiating MDL, MDO, and MDR Codes

The functional code is the most critical segment for distinguishing between signal directions.

  • MDL (Discrete Input): These modules receive signals from field devices like limit switches or proximity sensors.
  • MDO (Discrete Output): These modules drive loads using solid-state transistors, commonly found in high-speed switching tasks.
  • MDR (Relay Output): These utilize mechanical relays to switch higher currents or AC/DC loads.

Therefore, an IC200MDL740 is strictly an input module. Using it to power a solenoid valve will not work and may trigger a PLC fault.

Technical Specifications of the IC200MDL740

The numeric suffix “740” provides deeper insight into the electrical characteristics. Specifically, the IC200MDL740 features 16 points of 24 VDC positive logic (sinking) inputs. These modules incorporate optical isolation to protect the internal logic from external voltage spikes. In control systems for oil and gas, this isolation prevents electrical noise from corrupting data integrity.

Field Experience: Practical Installation Tips

From my 15 years in the field at Powergear X Automation, I have observed that most commissioning errors stem from simple wiring oversights.

  • Labeling Integrity: Always label wires according to the MDL/MDO distinction before power-up.
  • Voltage Matching: Ensure the field power supply matches the 24 VDC requirement of the 740 series.
  • Vibration Management: Use high-quality ferrules in environments with heavy machinery to prevent “ghost signals.”
  • Noise Suppression: Implement external shielding for long cable runs to maintain signal clarity.

The Evolution of I/O in Modern Automation

While GE Fanuc transitioned through various brand iterations (GE IP, Emerson), the core logic of these model numbers remains consistent. Modern DCS and PLC environments still rely on these standardized naming conventions for legacy support. Our team at Powergear X Automation recommends keeping a digital cross-reference sheet to expedite spare parts procurement and emergency repairs.

Expert FAQ: Selection and Maintenance

Q1: Can I replace an MDL input module with an MDR relay module if the voltages match?
No, they serve opposite functions. An MDL receives information, while an MDR sends commands. Swapping them will result in a non-functional loop and potential short circuits.

Q2: What is the most common failure point for the IC200MDL740 in harsh environments?
Over-voltage on the input pins is the leading cause. While they are opto-isolated, a sustained surge from a faulty sensor can eventually degrade the internal circuitry.

Q3: How do I verify if a module is “Sourcing” or “Sinking” without a manual?
Generally, GE Fanuc MDL modules are grouped by logic type. The 740 is a “Sinking” input, meaning it requires a “Sourcing” sensor. Always check the wiring diagram on the side of the module housing for the common (COM) terminal polarity.

Application Scenarios

  • Manufacturing: Using MDL740 modules to monitor conveyor belt status via photoelectric eyes.
  • Chemical Processing: Integrating MDO output modules to trigger safety alarms based on input thresholds.
  • Water Treatment: Utilizing MDR modules for heavy-duty motor starter coils that require high-current switching.

For more technical insights and a comprehensive inventory of GE Fanuc components, visit the experts at Powergear X Automation. We provide the technical support and hardware reliability your facility demands.

VersaMax PLC Troubleshooting: LED ON but No Output Guide

Fixing GE Fanuc VersaMax Output Faults | Powergear X Automation

Troubleshooting GE Fanuc VersaMax: When the Output LED is ON but the Load is OFF

The Gap Between PLC Logic and Physical Execution

GE Fanuc VersaMax modules provide deterministic control for demanding sectors like oil and gas or chemical processing. An active output LED confirms that the PLC processor successfully executed the logic command. However, this light does not monitor the integrity of the field-side circuit. If your external relay fails to actuate, you must shift your focus from the software to the physical wiring and load compatibility.

VersaMax PLC Troubleshooting: LED ON but No Output Guide

Evaluating Output Circuitry and Load Matching

Selecting the wrong output type is a frequent mistake during system commissioning. VersaMax offers both mechanical relay and solid-state transistor (sinking/sourcing) modules. A transistor output cannot drive an AC coil directly. Furthermore, high-performance compact relays often draw significant inrush currents. If this current exceeds the module’s rating, the output stage may protect itself by limiting flow, even while the LED stays lit.

Identifying Common Wiring and Grounding Faults

VersaMax modules typically organize outputs into shared groups with a common terminal. A “floating” or disconnected common is a silent killer of system functionality. During panel retrofits, technicians often accidentally disconnect these shared references. Without a complete path for current, the field device remains de-energized despite the module’s internal logic status.

Field Maintenance and Voltage Verification Strategies

Never assume that a glowing LED equals presence of voltage at the terminal. Always use a calibrated multimeter to measure voltage directly at the load’s coil. In my experience with offshore skid maintenance, blown fuses in marshalling cabinets are more common than actual PLC hardware failures. Verify the field power supply before you decide to pull the module from the rack.

Enhancing System Longevity with Protective Components

Inductive loads generate high-voltage spikes when de-energized, which can degrade PLC contacts over time. I strongly recommend installing flyback diodes for DC loads or RC snubbers for AC loads. Adhering to IEC 61131-2 standards for surge suppression ensures your control system operates reliably for years rather than months.

Expert Commentary by Powergear X Automation

From a technical perspective, the VersaMax line remains a robust choice for legacy support and mid-range applications. However, as industrial environments become more complex, the reliance on interposing relays is no longer optional—it is a best practice. We suggest using ferrules and vibration-resistant terminals to prevent intermittent failures in high-vibration areas like pump stations.

Technical Checklist for Reliable Output Control

  • Confirm the output module voltage matches the relay coil.
  • Verify all common terminals have a secure path to ground or neutral.
  • Check for blown field-side fuses or tripped circuit breakers.
  • Install external surge suppression for all inductive components.
  • Inspect terminal screws for tightness in high-vibration zones.

Application Scenario: Chemical Dosing Pump

In a recent chemical processing project, a VersaMax transistor output failed to trigger a dosing pump. The LED was active, but the pump’s internal relay required more holding current than the module provided. By installing a slimline interposing relay, we isolated the PLC from the load, protecting the hardware and ensuring consistent pump cycles.

For more technical resources and high-quality automation components, visit Powergear X Automation.

Frequently Asked Questions (FAQ)

Q1: Does a lit LED mean the VersaMax module is definitely working?
The LED only confirms that the PLC’s internal logic has successfully “set” that point. It does not guarantee that the output transistor or relay contact has physically closed or that power is reaching your field device.

Q2: How do I choose between a relay and a transistor output module?
Choose transistor modules for high-speed switching and long life cycles. Use relay modules for higher current loads or when you need to switch different voltages, though they have a finite mechanical lifespan.

Q3: What is the best way to prevent “ghost” signals in my control panel?
Use shielded cabling for long runs and ensure your 0V or Neutral commons are properly referenced. If you see low “leakage” voltage on a digital output, an interposing relay can help clear the signal.

Troubleshooting AB PLC Non-Recoverable Faults: A Field Guide

How to Export & Analyze Allen-Bradley Non-Recoverable Major Faults

Troubleshooting Allen-Bradley Non-Recoverable Major Faults: A Diagnostic Guide

The Critical Role of the PLC Fault Log

In industrial automation, a “Non-Recoverable Major Fault” signal usually means production has already halted. Consequently, the controller’s fault log becomes your most valuable diagnostic asset. Engineers must export this data to distinguish between firmware corruption and hardware failure. Moreover, accurate logs support Root Cause Analysis (RCA) and help meet regulatory standards like FDA 21 CFR Part 11. Without this data, maintenance teams often waste hours guessing the cause of unplanned downtime.

Troubleshooting AB PLC Non-Recoverable Faults: A Field Guide

Understanding Fault Types and Code Granularity

Allen-Bradley systems, including ControlLogix and CompactLogix, categorize errors by Type, Code, and Extended Code. These specifics are vital because a non-recoverable fault often indicates a deep hardware or firmware conflict. For example, my field experience shows that electrostatic discharge (ESD) often triggers memory corruption. While front-panel LEDs might show a generic red light, the exported log reveals the specific memory address failure. Therefore, granular data is essential for preventing repeat occurrences in high-stakes factory automation environments.

Protecting Data in Volatile Controller Memory

Controllers store fault logs in volatile memory, which clears if the system loses power. To prevent data loss, I highly recommend installing a non-volatile memory module, such as the 1784-SD2. This hardware ensures the fault history survives a power cycle or a complete CPU reset. In continuous-process industries, losing this history can extend the Mean Time to Repair (MTTR) significantly. Furthermore, a permanent record is necessary for compliance audits in pharmaceutical or chemical plants.

Navigating Studio 5000 Compatibility Issues

Exporting a detailed fault log requires the correct version of Studio 5000 Logix Designer. If you use a mismatched software version, you might go online but miss critical “Extended Code” details. Always ensure your workstation software version matches or exceeds the controller’s major firmware revision. In addition, maintaining a multi-version installation on your engineering laptop prevents “diagnostic blind spots” when working with legacy control systems.

A Field-Proven Workflow for Exporting Logs

When a fault occurs, follow a disciplined technical process to ensure you capture every detail. Do not rush to clear the fault immediately, as this erases the evidence needed for a permanent fix.

  1. Establish a secure connection using Studio 5000 Logix Designer.
  2. Navigate to Controller Properties and select the Major Faults tab.
  3. Record the specific Fault Type, Code, and Extended Code.
  4. Select Tools then Save Project with Fault Information.
  5. Capture screenshots of the Diagnostics tab for additional context.

Practical Maintenance Insights from the Factory Floor

In high-EMI (Electromagnetic Interference) environments, “Non-Recoverable” faults often stem from poor grounding rather than a defective CPU. Before replacing expensive hardware, I suggest inspecting surge suppression and backplane integrity. If a controller faults repeatedly after power cycles, the power supply is the most likely culprit. Powergear X Automation experts often find that replacing the power supply solves 30% of persistent non-recoverable errors without needing a new processor.

The Powergear X Automation Perspective on Reliability

At Powergear X Automation, we believe that data-driven maintenance is the backbone of modern industrial reliability. We often see teams replace CPUs prematurely due to a lack of diagnostic clarity. By integrating non-volatile memory and robust firmware version control, you create a more resilient control system. If you are looking to upgrade your legacy systems or need high-quality replacement modules, our team provides the technical expertise to ensure your hardware choices match your operational needs.

Application Scenario: Resolving Intermittent Backplane Failures

In a large-scale pharmaceutical packaging line, a ControlLogix CPU reported a non-recoverable fault every 48 hours. By exporting the fault log, the engineering team identified “Type 01 Code 01” errors, which pointed to backplane communication issues. Instead of replacing the CPU, they discovered a loose 1756-A10 chassis mounting bolt causing intermittent grounding issues. This discovery saved the plant over $10,000 in unnecessary hardware costs.

Frequently Asked Questions (FAQ)

1. Does a non-recoverable fault always require a hardware replacement?
No, it does not. Statistics suggest nearly 50% of these faults result from power quality issues or firmware glitches. Always analyze the “Extended Fault Code” before purchasing new components.

2. What is the most common mistake made during an emergency fault event?
The most common error is clearing the fault or cycling power before exporting the log. This action permanently deletes the diagnostic breadcrumbs needed for a true root cause analysis.

3. How can I ensure my fault logs are preserved during a total power failure?
You should equip every mission-critical Allen-Bradley PLC with an industrial-grade SD card (non-volatile memory). Configure the controller to store “Project and Fault” data to the card on every major fault event.

Choosing Bently Nevada Relay Modules for Machinery Protection

Choosing Bently Nevada Relay Modules for Machinery Protection

Bently Nevada 3500/32M vs. 3500/33: Choosing the Right Relay Module for Machinery Protection

In the world of industrial automation and condition monitoring, selecting the correct relay interface is a critical engineering decision. The Bently Nevada 3500 series remains the industry benchmark for machinery protection systems (MPS). However, many engineers struggle to decide between the 3500/32M 4-Channel Relay Module and the 3500/33 16-Channel Relay Module. While both serve as the bridge between software logic and hardware action, their internal architectures suit vastly different risk profiles. This guide explores their technical nuances to help you optimize your plant’s safety and efficiency.

Choosing Bently Nevada Relay Modules for Machinery Protection

Reliability Engineering for High-Risk Shutdowns

The 3500/32M is the “gold standard” for critical machinery protection. Unlike standard control components, this module prioritizes safety integrity above all else. It supports sophisticated voting logic, such as 1oo2 or 2oo3 configurations, across multiple modules. This capability is essential for meeting API 670 standards in oil and gas or power generation environments. At Powergear X Automation, we observe that the 3500/32M significantly reduces the probability of a “fail-to-danger” scenario while simultaneously preventing costly nuisance trips.

Maximizing Efficiency with High-Density Annunciation

In contrast, the 3500/33 module focuses on high-density relay output. It provides 16 channels in a single slot, making it four times more space-efficient than the 32M. However, it lacks the advanced voting logic found in its counterpart. Each relay operates on a simple one-to-one basis with its assigned alarm. This makes it an excellent choice for non-critical “Balance of Plant” (BoP) equipment. It is ideal for driving alarm lights or sending status signals to a DCS (Distributed Control System) or PLC (Programmable Logic Controller).

Navigating the Trade-off Between Density and Risk

Choosing between these modules involves balancing cabinet space against operational risk. If a 3500/33 module fails, the system loses 16 output points simultaneously. For non-critical monitoring, this is a manageable risk. For a multi-million dollar turbine, however, such a failure could be catastrophic. The 3500/32M limits the “blast radius” of a hardware failure to only four channels. Consequently, safety-instrumented systems (SIS) almost exclusively utilize the 4-channel version to maintain high availability.

Technical Best Practices for Field Installation

Successful deployment requires more than just picking a part number. Field experience suggests that high-vibration environments demand specific installation techniques. For example, installers should always use ferruled wiring on the 3500/33 to manage its dense terminal blocks. Furthermore, neither module contains internal surge suppression for inductive loads. We highly recommend adding external flyback diodes or RC snubbers when driving heavy-duty solenoids. Proper documentation of I/O mapping is also vital to avoid troubleshooting delays during commissioning.

The Powergear X Automation Perspective on Tech Trends

The industry is moving toward stricter SIL (Safety Integrity Level) requirements. As a result, the 3500/32M is becoming the default choice for modern greenfield projects. While the 3500/33 remains a cost-effective solution for legacy expansions, it often fails modern safety audits for trip-line functions. At Powergear X Automation, we suggest that clients evaluate their “cost of downtime” before choosing the high-density option for any automated shutdown path.

Technical Summary and Requirements

  • Logic Support: 3500/32M supports 1oo2, 2oo3, and 1oo4 voting logic.
  • Capacity: 3500/33 offers 16 relays for maximum rack space savings.
  • Compliance: 3500/32M meets rigorous API 670 requirements for machinery protection.
  • Protection: External surge suppression is required for all inductive loads.
  • Wiring: Use ferrules and strain relief in high-vibration areas.

Application Scenarios

  • Scenario A (Critical): A high-pressure centrifugal compressor in a refinery. Use the 3500/32M to ensure a 2oo3 voting logic prevents false trips.
  • Scenario B (Utility): Cooling water pumps for an auxiliary system. Use the 3500/33 to provide cost-effective annunciation to the control room.

Frequently Asked Questions (FAQ)

Q: Can I use the 3500/33 for an emergency shutdown (ESD) function?
A: Technically, it can toggle a signal, but we strongly advise against it. The 3500/33 lacks the voting logic and fault tolerance required for true ESD applications. For any “trip” function, the 3500/32M is the safer, more reliable choice.

Q: What is the most common failure mode during commissioning?
A: Wiring errors are most frequent with the 3500/33 due to its high density. With the 3500/32M, the most common issue is improper configuration of the voting logic in the 3500 Rack Configuration Software.

Q: How do I choose between these for a mid-life system upgrade?
A: Perform a risk assessment on each relay point. If the relay prevents machine damage or human injury, upgrade to the 3500/32M. If the relay only provides “information” to the operator, the 3500/33 is sufficient.

For more technical insights and high-quality automation components, visit the experts at Powergear X Automation today.

Bently Nevada 177230 Guide: RMS Velocity for Vibration Monitoring

Bently Nevada 177230 Guide: RMS Velocity for Vibration Monitoring

Optimizing Machine Health with Bently Nevada 177230 Seismic Transmitters

The Role of RMS Velocity in Modern Industrial Automation

The Bently Nevada 177230 Seismic Transmitter measures machine casing vibration to provide a stable 4–20 mA output. Unlike peak-value sensors, this device focuses on Root Mean Square (RMS) velocity. This distinction is vital because RMS reflects the true destructive energy within a mechanical system. Most DCS and PLC systems in factory automation rely on this steady signal for real-time monitoring.

Bently Nevada 177230 Guide: RMS Velocity for Vibration Monitoring

Alignment with ISO Vibration Severity Standards

Maintenance teams often use ISO 10816 or ISO 20816 to determine equipment health. These standards define vibration severity limits specifically in RMS units. Therefore, using the 177230 eliminates the need for manual mathematical conversions. This alignment ensures that your alarm and trip setpoints remain accurate and consistent across the plant.

Technical Advantages of Integrated Signal Conditioning

This transmitter integrates the seismic sensor and signal processor into a single, rugged housing. By filtering out transient high-frequency noise, it prevents the “spikes” that often trigger false alarms in peak-detecting systems. Consequently, operators experience fewer unnecessary shutdowns, which directly improves overall equipment effectiveness (OEE) in chemical processing and power generation.

Seamless Integration into DCS and PLC Networks

The 4–20 mA loop design makes the Bently Nevada 177230 highly compatible with existing control systems. The current-driven signal offers high immunity to electromagnetic interference (EMI), which is common in VFD-heavy environments. Furthermore, you can install these transmitters over long distances without losing signal integrity or accuracy.

Expert Tips for Mechanical Installation and Coupling

Proper mounting is the most overlooked factor in vibration monitoring. You must attach the transmitter to a rigid, flat surface as close to the bearing housing as possible. Poor coupling attenuates vibration energy and leads to undervalued RMS readings. Avoid mounting on thin covers or flexible brackets, as these create false resonance and distort data.

Managing Electrical Noise and Surge Protection

High-noise industrial environments require shielded twisted-pair cabling to ensure signal purity. You should ground the shield at only one end to prevent ground loops. For outdoor installations in the oil and gas sector, I highly recommend using external surge arresters to protect the internal circuitry from lightning or power surges.

Technical Excellence Summary

  • True RMS velocity output ensures compliance with ISO 10816 standards.
  • Onboard signal conditioning reduces false trips from transient vibration spikes.
  • Rugged 4–20 mA loop design supports long-distance, noise-immune transmission.
  • Direct compatibility with PLC and DCS simplifies control system architecture.
  • Compact form factor allows for installation in tight bearing housing spaces.

Author Insight by Powergear X Automation

In my experience, many facilities struggle with “nuisance trips” because they use peak-detecting sensors on aging equipment. Switching to an RMS-based system like the Bently Nevada 177230 provides a much smoother trending curve. It allows the maintenance team to see the gradual degradation of a bearing rather than reacting to every minor mechanical jar. If you are upgrading from legacy mechanical switches, this is the most cost-effective way to modernize your plant’s reliability program.

For more technical guides and high-quality automation components, visit the experts at Powergear X Automation.

Practical Application Scenarios

  • Centrifugal Pumps: Continuous monitoring of bearing housing vibration to prevent catastrophic seal failure.
  • Cooling Tower Fans: Detecting blade imbalances or gearbox wear in harsh, moisture-heavy environments.
  • Electric Motors: Providing early warning for stator eccentricity or rolling-element bearing defects.
  • Industrial Compressors: Monitoring high-speed rotation to ensure compliance with safety interlocking protocols.

Frequently Asked Questions (FAQ)

Q1: How do I verify if the transmitter is functioning correctly during commissioning?
Establish a baseline reading while the machine is running under normal, stable conditions. If the RMS value drifts significantly without a change in machine load, inspect the mounting torque first. Most “failures” are actually caused by loose mechanical coupling or improper cable grounding.

Q2: What is the biggest mistake to avoid when replacing a peak-detecting sensor?
Never copy your old alarm setpoints directly. Peak values are mathematically higher than RMS values (Peak ≈ 1.414 × RMS for pure sine waves). If you don’t recalculate your thresholds, your new system may be too “relaxed” and fail to trip during a genuine fault.

Q3: Can this transmitter be used in hazardous or explosive environments?
Yes, but you must select the specific model variant with the appropriate certifications (such as ATEX, IECEx, or CSA). Always verify the part number suffix to ensure the housing and electrical ratings match your local safety classification.

Maximizing Uptime: Why GE RX3i Excels in Continuous Production

RX7i to RX3i Migration Guide | Optimize Industrial Control

Maximizing Industrial Efficiency: Migrating from RX7i to PACSystems RX3i

The Strategic Value of System Modernization

Modernizing your control infrastructure from the legacy RX7i to the PACSystems RX3i platform represents a significant leap in operational capability. In my experience at Powergear X Automation, we see that this transition isn’t just about replacing hardware. It is about unlocking higher communication bandwidth and superior flexibility. Industries such as petrochemicals and pharmaceuticals require precise control. Consequently, the RX3i provides the necessary backbone for complex logic and high-speed data acquisition.

Maximizing Uptime: Why GE RX3i Excels in Continuous Production

Technical Deep Dive: Processing Power and Memory

The heart of the RX3i upgrade lies in its advanced CPU modules, such as the IC698CPE020, CPE030, and CPE040. These processors utilize Pentium M technology to deliver significantly faster clock speeds compared to their predecessors.

  • Reduced Cycle Times: Higher clock speeds shorten logic scan cycles.
  • Precision Control: Faster response improves temperature regulation in chemical reactors.
  • Waste Reduction: High-speed packaging lines benefit from decreased reject rates.

Moreover, the expanded cache memory ensures that the system handles large-scale automation tasks without latency.

Ensuring Continuity through Advanced Redundancy

For mission-critical environments, the IC698CRE020 redundancy module is indispensable. This hardware facilitates instantaneous synchronized switching between primary and backup controllers.

  • Zero Downtime: Automated failover prevents costly unplanned shutdowns.
  • Safety Compliance: The architecture aligns with rigorous IEC 61508 standards.
  • Risk Mitigation: Redundancy eliminates single points of failure in energy grids.

Our team often notes that high-reliability systems pay for themselves by avoiding just one hour of production stoppage.

Optimizing Connectivity and Protocol Integration

The IC698ETM001 Ethernet module serves as the bridge for modern industrial internet of things (IIoT) applications. It supports 100 Mbps throughput and integrates seamlessly with Modbus/TCP and GE Ethernet/IP protocols. Therefore, users experience significantly lower latency in SCADA systems. This improved connectivity allows for smoother remote diagnostics. As a result, engineers spend less time on-site during commissioning and troubleshooting phases.

Best Practices for Installation and Maintenance

To ensure long-term stability, technical teams must follow strict physical installation protocols. High-vibration environments demand specific mechanical reinforcements.

  • Use anti-vibration bolts to secure CPU modules.
  • Apply vibration-resistant ferrules on all wiring ports.
  • Install external surge protectors for Ethernet interfaces.
  • Maintain cabinet temperatures between 0°C and 60°C.
  • Clean air ducts and cooling fans quarterly.

Proper thermal management prevents premature component aging. Furthermore, shielding the CPU from power surges protects your capital investment from grid fluctuations.

Powergear X Automation Commentary

At Powergear X Automation, we believe the industry is shifting toward “Software-Defined Automation.” While the RX3i is robust hardware, its true strength lies in how it handles data-intensive workloads. We recommend that users do not just “swap” modules. Instead, use this migration to audit your network topology. Upgrading to RX3i offers a rare window to optimize your entire control loop for the next decade of production.

Practical Application Scenarios

  • Petrochemical Refining: Managing thousands of I/O points with high-speed redundancy for safety-instrumented functions.
  • Pharmaceutical Batching: Utilizing precise CPU scanning to meet strict FDA regulatory tracking and dosage accuracy.
  • Automotive Assembly: Integrating multiple third-party sensors via Ethernet/IP for real-time quality monitoring.

Frequently Asked Questions (FAQ)

1. When is the right time to move from RX7i to RX3i?
You should consider an upgrade if your current RX7i system experiences “logic lag” or if you cannot find spare parts easily. Additionally, if your facility requires better integration with modern SCADA or Cloud platforms, the RX3i is the logical successor.

2. Can I reuse my existing RX7i I/O racks with a new RX3i CPU?
The RX3i is designed for high backward compatibility. Most RX7i I/O modules work perfectly; however, very early ETM modules or specialized high-power units may require firmware updates. We suggest a full compatibility audit before purchasing.

3. What is the most common mistake during RX3i commissioning?
The most frequent error is neglecting the grounding and surge protection of the Ethernet ports. Unlike older serial connections, high-speed Ethernet is sensitive to electromagnetic interference. Always use industrial-grade shielded cables to ensure data integrity.

Looking for genuine GE PACSystems components or expert migration support? Visit the experts at Powergear X Automation to find the latest CPU modules and customized control solutions for your facility.

Back to Top
Product has been added to your cart