Servo Drive Repair vs. Replacement in Industrial Automation
Overview
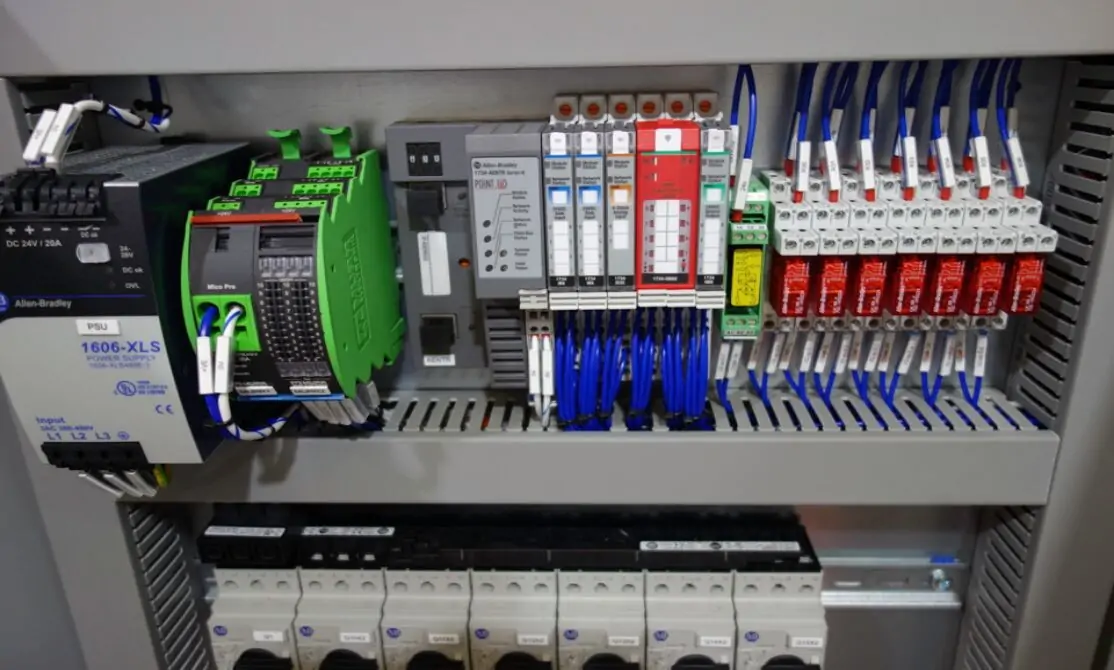
Servo drives are the unsung heroes of precision manufacturing, providing the speed and accuracy necessary for robotics, CNC machinery, and high-speed packaging lines.When a drive malfunctions, production grinds to a halt quickly. Whether your facility relies on a Mitsubishi MR-J2S, Yaskawa SGDH, or FANUC A06B series drive, fast and effective troubleshooting is crucial. A systematic approach determines the difference between a fleeting inconvenience and a costly, extended shutdown. This expert guide walks you through a structured, five-step diagnostic process. We highlight common brand-specific failure signatures. Finally, we provide clear criteria for deciding whether to repair, replace, or escalate the issue within your factory automation system.
Step 1: Systematically Identify Failure Symptoms
Before reaching for a multimeter or a manual, you must gather detailed, observable symptoms. Simply noting “drive fault” is insufficient for accurate diagnostics. Specificity saves time.
Observable Indicators:
A specific alarm or fault code appears on the drive’s display.
The motor is completely unresponsive or exhibits erratic, jittering movement.
Motion unexpectedly stops mid-cycle, disrupting the PLC sequence.
A distinct burnt odor is present, or the drive housing feels excessively hot.
The drive shows no display and has no power indicator lights.
Pro Tip from the Field: Document the exact drive model number and the displayed alarm code immediately. Moreover, record the system’s behavior just before the failure. This information is vital for accurately isolating the root cause and defining the next course of action.
Step 2: Eliminate External Factors First (Power and Wiring)
In industrial automation, internal drive failures account for fewer issues than external problems. Before investigating complex fault codes, eliminate the simplest, most common external causes first.
Fundamental Electrical Checks:
Verify Input Voltage: Use a true RMS multimeter to confirm the drive receives the correct input voltage at the terminals.
Inspect Connections: Check all cables and terminals for loose connections, corrosion, or signs of arcing and heat damage.
Check for Shorts/Ground Faults: A short circuit in the motor winding or cabling often triggers immediate drive overcurrent alarms.
Powergear X Automation Insight: We estimate that over 40% of all reported “drive faults” are resolved by simply correcting power or wiring issues. For instance, on a Yaskawa SGDH drive, an A.C. alarm frequently points to a shorted output or incorrect motor wiring. Therefore, always confirm good grounding, especially on older legacy systems like the Mitsubishi MR-J2S, after any maintenance.
Step 3: Interpret Drive Alarm Codes and Fault History
Servo drives incorporate sophisticated self-diagnostic capabilities. The alarm or fault code displayed on the panel is your most important clue. Different brands use distinct codes for similar failures.
Key Fault Codes by Brand:
Mitsubishi MR-J2S:
- AL.37: Indicates Overcurrent during deceleration—often a mechanical issue or tuning problem.
- AL.33: Points to an Encoder error—a feedback problem.
No Display: Often suggests a blown fuse or power board failure.
Yaskawa SGDH:
- A.C.: Output short circuit—check motor/cable integrity.
- A.E.: Overvoltage—frequently caused by poor regeneration handling.
Solid Red LED: Indicates a severe internal hardware failure.
FANUC A06B:
- AL-1: Overcurrent—a common indication of a shorted load or motor.
- AL-3: Regenerative error—the drive cannot dissipate energy effectively.
- No LED: Suggests an issue with the control or power board.
Expert Tip: Many modern drives and even some legacy control systems store a fault history log. Reviewing this log helps identify patterns. In addition, recurring errors suggest environmental factors like heat, vibration, or unstable input power.
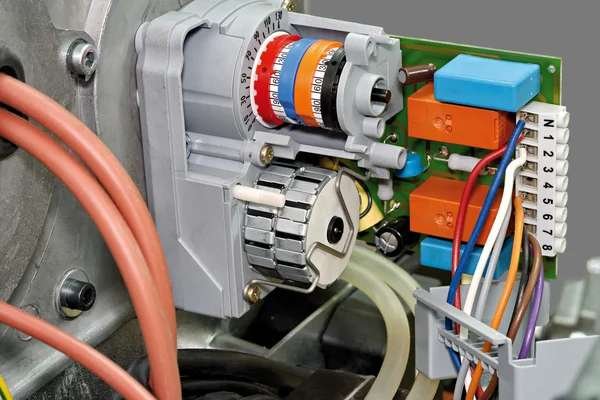
Step 4: Isolate the Problem to the Motor or the Drive
The servo drive and motor operate as a synchronized, closed-loop system. A fault originating in the motor (e.g., a shorted coil or a damaged encoder) will cause the drive to trip, masking the true source.
Motor Testing Methods:
- Known-Good Swap: The quickest diagnostic method is temporarily swapping the suspect motor with a functional, known-good spare unit.
- Electrical Verification: Perform a Megger test to check for shorts to ground and use a multimeter to confirm equal resistance across all motor phases.
Brand-Specific Motor Failure Notes:
- MR-J2S: Encoder feedback problems are prevalent. Always check the integrity of the encoder cable and connector pins.
- SGDH: Persistent A.E. or A.C. alarms often require checking for open or shorted motor windings.
- A06B: Motors with shorts to the ground are a leading cause of damage to the power output section of the drive.
Solution Scenario: If on-site motor testing is impractical, specialized facilities offer bench testing and joint drive-motor evaluations to diagnose system interaction issues accurately before further equipment is damaged.
Step 5: Make the Informed Decision: Repair, Replace, or Retest
Downtime is costly. Your final decision—repair or replace—must balance cost-effectiveness against required recovery speed. Statista data shows that the cost of unplanned downtime in manufacturing can exceed $10,000 per hour.
| Action | Justification |
| Repair the Drive | The failure is clearly internal (e.g., blown component). The model is obsolete or legacy (like MR-J2S) and expensive to replace. A cost-effective fix is needed, and you can tolerate a few days of turnaround time. You must retain the original application settings or custom wiring. |
| Replace the Drive | The same fault has recurred multiple times. There is visible, catastrophic damage (burned components, cracked boards). Immediate recovery is mandatory to prevent production line delays. You are actively upgrading the control systems to newer, supported models. |
| Retest or Escalate | The fault is intermittent or only happens under high load. You have replaced the drive, but the problem persists. You strongly suspect external factors like EMI or grounding issues. |
Powergear X Automation offers trusted, warranty-backed repair services for legacy and current industrial automation components, including the MR-J2S, SGDH, and A06B series.
Final Thoughts: Minimizing Downtime in Motion Control
Troubleshooting a servo drive failure is manageable when you follow a structured, step-by-step methodology. By systematically checking power, wiring, fault codes, and the motor condition, maintenance teams can quickly isolate the true issue. This allows for a pragmatic decision regarding repair or replacement, minimizing the overall impact on production.
Powergear X Automation helps manufacturers maintain continuous operation by providing essential services:
Thousands of in-stock servo drives for immediate replacement.
Trusted, expert repair services for obsolete and current models.
Fast turnaround and same-day shipping on critical spares.
Don’t let a drive failure dictate your production schedule.
Need expert support, quick diagnostics, or a rapid replacement for your industrial automation components? Contact our certified team today. Click the link to explore our solutions: Powergear X Automation
Frequently Asked Questions (FAQ)
Q1: What is the significance of the “No Display” fault on a Mitsubishi MR-J2S drive, and what should I check first?
A: A “No Display” on the MR-J2S typically signifies that the low-voltage control power supply on the drive’s power board has failed. Before concluding the drive needs repair, always check the incoming control voltage fuse. If the fuse is intact, the failure is usually internal (e.g., a power supply circuit failure), requiring the unit to be sent to a dedicated repair center.
Q2: My Yaskawa SGDH drive trips on an “A.E.” (Overvoltage) alarm only when the machine decelerates quickly. Why is this happening?
A: This is a classic symptom of a failure in the regenerative circuit, which handles the energy fed back from the motor during deceleration. The drive is unable to dissipate this energy, causing the DC bus voltage to spike. The issue could be a faulty internal braking transistor, a failed external braking resistor unit (if used), or incorrect wiring to the external resistor. Check the resistor’s continuity and connections, as this is a more common point of failure than the drive’s internal components.
Q3: We have recurring encoder errors (AL.33 on MR-J2S) after a major machine vibration event. Can I fix this without replacing the drive or motor?
A: Recurring encoder errors, especially after a physical shock, suggest mechanical damage or a connection problem, not necessarily a motor coil failure. First, meticulously check the encoder cable and its connector at both the motor and the drive end for any bent pins or abrasions in the shielding. If the error persists, the encoder head or disk inside the motor is likely misaligned or damaged. Replacing the motor’s encoder unit or the entire motor is usually the required course of action, as internal encoder repair on-site is difficult.