Over 50,000 hot-selling automation module components.
Testing 3300 XL 8mm Proximity Probes with an Oscilloscope

Testing 3300 XL 8mm Proximity Probes with an Oscilloscope

Understanding the 3300 XL Proximity Probe System

The 3300 XL 8mm proximity probe is a crucial component in industrial automation. These probes are essential for measuring shaft position, vibration, and speed. They are widely used in factory automation and control systems. A typical system includes the probe, an extension cable, and a proximity probe transducer. This system provides critical data for monitoring rotating machinery. Understanding its function is the first step to effective troubleshooting.

Testing 3300 XL 8mm Proximity Probes with an Oscilloscope

Why an Oscilloscope is Your Best Tool

An oscilloscope is a powerful diagnostic tool. It visualizes the probe’s output signal. This lets you see dynamic changes in real-time. Therefore, you can pinpoint issues that a simple multimeter cannot. An oscilloscope shows signal noise, voltage drift, and proper waveform shape. This is vital for accurate diagnostics. Without an oscilloscope, you might miss subtle signal problems.

Step-by-Step Guide to the Testing Process

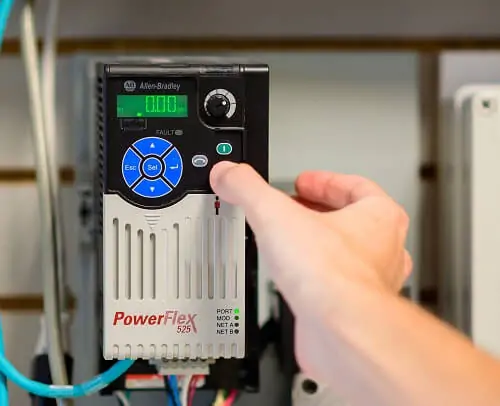
First, connect the probe system to a power supply. The 3300 XL probe requires a DC power source. Next, connect the oscilloscope to the transducer output. Use a BNC cable for a secure connection. Set the oscilloscope to DC coupling. The voltage scale should be appropriate for the expected output range. Move a metallic target in front of the probe tip. Observe the voltage trace on the oscilloscope screen. The voltage should change smoothly as the target moves. This confirms the probe is working correctly. A steady voltage indicates a fault.

Testing 3300 XL 8mm Proximity Probes with an Oscilloscope

Interpreting the Oscilloscope Waveform

A healthy proximity probe signal is a smooth, clean DC voltage. This voltage varies based on the target distance. As the target moves closer, the voltage drops. Conversely, the voltage rises as the target moves away. A noisy or erratic waveform suggests a problem. The issue could be electrical interference or a damaged cable. For example, a wavy pattern might mean improper grounding. Furthermore, a sudden voltage drop indicates a fault in the probe itself or the extension cable.

Common Problems and Troubleshooting Tips

Several issues can affect 3300 XL probe performance. Common problems include mechanical damage or incorrect gap settings. A damaged probe tip will produce a faulty signal. An improper mounting gap also leads to inaccurate readings. For instance, if the probe is too far from the target, the output signal is weak. Checking for loose connections is also a critical step. Moreover, environmental factors like temperature or humidity can impact sensor performance. Therefore, always consider the operating environment during your analysis.

Testing 3300 XL 8mm Proximity Probes with an Oscilloscope

My Take on Industrial Monitoring

In my experience, proactive testing is key to reliable industrial automation. While some companies rely on reactive maintenance, a predictive approach saves money. Using tools like oscilloscopes for routine checks prevents catastrophic failures. The 3300 XL system is a Bently Nevada standard, known for its reliability. However, even the best equipment needs proper maintenance. My advice is to invest in good diagnostic tools and training. This ensures your PLC and DCS systems receive accurate data. Ultimately, this practice enhances operational safety and efficiency.

Solutions and Applications in the Field

Powergear X Automation Limited specializes in providing robust solutions for rotating machinery. Our products are designed to integrate seamlessly with your existing control systems. We offer a full range of sensors, including the 3300 XL series, along with expert support. For more information on our solutions and to find the right products for your application.

ModelTitleLink
330105-02-12-30-02-CNBently Nevada Reverse Mount ProbeLearn More
330105-02-12-30-12-003300 XL 8 mm Reverse Mount ProbeLearn More
330105-02-12-15-12-053300 XL 8 mm Proximity ProbeLearn More
330105-02-12-05-12-053300 XL 8 mm Proximity ProbeLearn More
Choosing Bently Nevada 3300 Proximity Probe Extension Cables

Choosing Bently Nevada 3300 Proximity Probe Extension Cables

Choosing the Right Extension Cable for 3300 XL 8 mm Proximity Probes

Selecting the correct extension cable is critical. It directly impacts your proximity probe system’s performance. Many people underestimate this crucial decision. You must choose a cable that matches the probe’s length. Mismatched cables can cause system issues. This guide will help you make the right choice. We will ensure your Bently Nevada 3300 XL system operates perfectly.

Choosing Bently Nevada 3300 Proximity Probe Extension Cables

Understanding the System Length

The total length of the proximity system is vital. This length includes the probe and the extension cable. The Bently Nevada 3300 XL series requires a specific total length. Common system lengths are 5 or 9 meters. You cannot mix different lengths. For example, a 5-meter probe needs a 5-meter extension cable. The system length must be a multiple of the probe length. Always check the total length requirement before you buy.

The Importance of Matching Components

You must match the probe and extension cable. The Bently Nevada 3300 XL 8 mm Proximity Probe is designed to work with a specific extension cable. Each component has unique electrical properties. Using a different brand can introduce errors. It will compromise the system’s accuracy. Using genuine Bently Nevada components guarantees reliable data. It also ensures the long-term health of your machinery. We have extensive experience with these systems. Our expertise can prevent costly mistakes.

Choosing Bently Nevada 3300 Proximity Probe Extension Cables

Common Mistakes to Avoid

Many users make common mistakes. They often use the wrong cable length. This leads to system linearity problems. Sometimes, they use non-standard cables. This can cause signal degradation. It will negatively affect your monitoring results. Always use an extension cable from the same series. For example, a 3300 XL probe requires a 3300 XL extension cable. Never cut or splice these cables. It will destroy the calibrated electrical properties.

Our Unique Perspective

We have worked with these systems for years. We know the unique challenges you face. Our goal is to simplify this process for you. We recommend you always verify your total system length. Then, choose the correct extension cable. Our team can help you with this selection. We offer high-quality, reliable components. Our products are thoroughly tested. They meet all original manufacturer specifications. You can trust our expertise.

Choosing High-Quality Products

Choosing a quality extension cable is a wise investment. It protects your valuable machinery assets. A high-quality cable ensures accurate measurements. It provides long-term, stable performance. We offer genuine Bently Nevada 3300 XL extension cables. You can find our full range of products at the link below. Don’t compromise on quality.

Ready to find the perfect extension cable for your system? Please explore our high-quality products from Powergear X Automation Limited by clicking below.

ModelTitleLink
330130-080-13-CNBently Nevada 3300 XL Extension CableLearn More
330130-045-13-00Bently Nevada 3300 XL Extension CableLearn More
330130-040-11-00Bently Nevada 3300 XL Extension CableLearn More
330130-080-00-05Bently Nevada Extension CableLearn More
330130-085-02-05Bently Nevada Standard Extension CableLearn More
Signal Verification and Testing Procedures for 3300 NSv Probes

Signal Verification and Testing Procedures for 3300 NSv Probes

Introduction

The Bently Nevada 3300 NSv series proximity probes stand as critical assets for machinery health. They provide invaluable data to prevent costly downtime. Proper signal verification for these probes ensures reliable and accurate data acquisition. I have performed many tests on these robust 3300 NSv probes. This guide helps you achieve accurate, trustworthy results every time. These procedures are simple but absolutely essential for successful operations.

Signal Verification and Testing Procedures for 3300 NSv Probes

Pre-Test Checklist and Preparation

Before you begin any testing, you must prepare correctly. Always start by disconnecting power to the system. You should also visually inspect all cables for any signs of damage. Make sure you have your test equipment ready, such as a multimeter and oscilloscope. This crucial step prevents errors and enhances safety for everyone. You avoid potential electrical shocks and equipment damage.

Static Verification and Gap Voltage

This initial test confirms the probe’s basic functionality. First, you connect the 3300 NSv probe to its proximitor. Now, measure the DC voltage across the output terminals. You should get a static voltage reading. This reading varies based on the target gap. This gap voltage shows the system’s baseline health. It confirms the entire system is working correctly.

Signal Verification and Testing Procedures for 3300 NSv Probes

Dynamic Signal Testing with a Micrometer

Next, we check the probe’s response to movement. Use a non-ferrous micrometer to slowly change the gap. Watch the voltage output on your meter as you move the micrometer. You should see a smooth, linear change in voltage. A sudden jump or no change at all indicates a fault with the probe. This confirms the 3300 NSv probe linearity and its proper function.

Insights from an Engineer

Remember that environmental factors can affect your results. Always ensure you are testing on a clean target surface. Avoid electromagnetic interference from other equipment nearby. My experience shows that a good ground connection is absolutely vital. You will get much more stable and reliable readings. Take your time during the testing process. This attention to detail saves significant time later.

Following these professional steps helps you verify your Bently Nevada 3300 NSv probes. This attention to detail secures your plant’s productivity and helps avoid unexpected failures. We have the right equipment for all your industrial needs. For verified and high-performance automation products, simply click this link to explore our Powergear X Automation Limited store.

ModelTitleLink
330905-00-16-05-02-05Bently Nevada 3300 NSV Proximity ProbesLearn More
330905-00-20-10-02-00Bently Nevada 3300 NSV Proximity ProbesLearn More
330905-00-06-10-02-00Bently Nevada 3300 NSV Proximity ProbesLearn More
330904-08-15-10-01-05Bently Nevada 3300 NSV Long Case ProbeLearn More
330904-08-10-10-01-05Bently Nevada 3300 NSV ProbeLearn More
Harnessing the Power of Ethernet/IP with the PowerFlex 525 Drive

Harnessing the Power of Ethernet/IP with the PowerFlex 525 Drive

Introduction

In industrial automation, connecting devices is key. The PowerFlex 525 drive is a true game-changer. It offers seamless integration with Ethernet/IP. This guide helps you unlock its full potential. You can achieve better control and efficiency. As an engineer, I’ve seen firsthand how this drive simplifies complex systems. Its built-in Ethernet/IP port makes setup a breeze. You can manage your motor and system data effortlessly. This capability is crucial for modern manufacturing. It helps you stay competitive and agile.

Harnessing the Power of Ethernet/IP with the PowerFlex 525 Drive

Product Overview

The PowerFlex 525 is a versatile AC drive. It’s designed for global applications. This drive has a compact, space-saving design. It also features a modular control and power section. This design allows for quick installation and setup. The PowerFlex 525 can be mounted vertically. It’s also easy to mount side-by-side. The drive works in temperatures up to 70°C. It’s a reliable solution for tough environments. Its integrated Ethernet/IP port is a major benefit. It provides easy network connectivity.

Technical Specifications

  • Ethernet/IP is a standard feature.
  • This drive supports Zero Stacking.
  • It has flexible motor control options.
  • The voltage range is 100 to 600V.
  • The power range is 0.4 to 22 kW.
  • It has an ambient temperature rating of 70°C.
  • The drive features a removable keypad.
  • The keypad allows for easy programming.
  • It includes a built-in EMI filter.
  • The filter reduces electromagnetic interference.

Key Benefits and Unique Insights

The PowerFlex 525 drive offers big advantages. Its most powerful feature is the integrated Ethernet/IP. This port eliminates the need for extra communication modules. This saves you money and panel space. I’ve found this feature invaluable. It simplifies wiring and configuration tasks. You can quickly add the drive to your network. This speeds up your project timeline. Another unique benefit is its Dual-Port Ethernet/IP option. This allows for ring topology (DLR). DLR makes your network more fault-tolerant. If one link fails, data still gets through. This is critical for uptime and reliability.

Harnessing the Power of Ethernet/IP with the PowerFlex 525 Drive

Choosing the Right Drive

Selecting the right drive is important. Consider your application’s needs. The PowerFlex 525 is great for many tasks. It works well for conveyors, fans, and pumps. Its fast setup time is a huge plus. This drive also supports Connected Components Workbench. This software simplifies programming. You can configure and monitor the drive easily. I often recommend this drive for new projects. It offers a great balance of features and value. It’s a smart investment for the future.

This guide should help you understand the PowerFlex 525. It’s more than just a motor controller. It is a vital part of your automation system. We have genuine Allen-Bradley products. They are available for a great price.

Click below links to explore our PowerFlex 525 drives. Enhance your automation systems today.

ModelTitleLink
25A-E012N104Allen-Bradley PowerFlex 523 AC Drive (600V AC)Learn More
25A-E019N104Allen-Bradley PowerFlex 523 AC DriveLearn More
25B-B062N104Allen-Bradley PowerFlex 525 Drive (20HP)Learn More
25B-E027N104Allen-Bradley PowerFlex 525 AC Drive (0.4kW)Learn More
25B-D1P4N104Allen-Bradley PowerFlex 525 AC DriveLearn More
Why the Allen-Bradley PowerFlex 40 is Ideal for Industrial Automation Applications

Why the Allen-Bradley PowerFlex 40 is Ideal for Industrial Automation Applications

Introduction

When I talk to customers about their motor control needs, they often want a solution that’s simple, reliable, and won’t break the bank. That’s where the Allen-Bradley PowerFlex 40 comes in. It’s one of those products that just works, and its design shows a real understanding of what industrial users need day-to-day. This isn’t just another variable frequency drive (VFD); it’s a solid, practical workhorse for a huge number of applications. Let’s dive into what makes it such a great choice.

Why the Allen-Bradley PowerFlex 40 is Ideal for Industrial Automation Applications

Compact and Easy to Install

The first thing you’ll notice about the PowerFlex 40 is its small size. In a world where every inch of panel space is valuable, this compact footprint is a huge advantage. It allows you to fit more equipment into a smaller enclosure, which can save you money and simplify your machine design. What’s more, the drive supports Zero Stacking™, a feature that lets you mount multiple drives side by side without needing extra space for air circulation. This is a game-changer for control panels where space is at a premium.

Robust Performance and Control

Despite its compact size, the PowerFlex 40 offers powerful control features. It uses Sensorless Vector Control, which provides excellent speed regulation and high torque even at low speeds. This means you can control your motors with precision, whether they’re driving a fan or a conveyor. It also includes an integral PID controller, which is incredibly useful for applications like pumping systems or fans where you need to maintain a set pressure or flow. These advanced features, often found in more expensive drives, make the PowerFlex 40 a very versatile option.

Built-In Flexibility

Another key benefit is the drive’s built-in flexibility. It has multiple digital and analog inputs and outputs, which makes it easy to integrate into your existing system. This reduces the need for external relays and complex wiring, simplifying your setup. It also comes with a built-in RS-485 communication port, so you can easily connect it to a PLC or HMI for remote control and monitoring. This means less time spent on installation and more time focusing on what really matters: getting your machine up and running.

Why the Allen-Bradley PowerFlex 40 is Ideal for Industrial Automation Applications

A Smart Investment

From a business perspective, the PowerFlex 40 is a very smart investment. Its cost-effective design means you get high-end features without a high-end price tag. The drive’s reliability reduces downtime, and its simple setup and configuration save valuable engineering time. When you consider the total cost of ownership—not just the initial purchase price—the PowerFlex 40 stands out as an excellent value.

The Final Word

The Allen-Bradley PowerFlex 40 is a testament to smart engineering. It balances compact design, robust performance, and flexible features in a package that is both affordable and reliable. For anyone in industrial automation looking for a dependable motor control solution that simplifies their work and fits their budget, the PowerFlex 40 is an easy recommendation.

If you’re ready to see how the Allen-Bradley PowerFlex 40 can improve your applications, please check out the products available from Powergear X Automation Limited today!

ModelTitleLink
22B-D2P3F104Allen-Bradley PowerFlex 40 AC Drive (230V)Learn More
22B-B017H204Allen-Bradley PowerFlex 40 Drive (480V)Learn More
22B-V5P0H204Allen-Bradley PowerFlex 40P Drive (120V)Learn More
22B-E012N104Allen-Bradley PowerFlex 40P AC Drive (600V)Learn More
Allen Bradley PowerFlex 40

Allen Bradley PowerFlex 40: Understanding Fault Codes and How to Fix Them

A Field Guide to PowerFlex 40 Faults: Know Your Drive Inside and Out

As an engineer who’s spent countless hours on factory floors, I’ve seen it all when it comes to variable frequency drives (VFDs). The Allen Bradley PowerFlex 40 is a workhorse—reliable, compact, and widely used. But even the best equipment can have problems. Understanding the fault codes is the first step to a quick fix. Don’t just reset the drive. Take a moment to understand what it’s trying to tell you. This guide will help you do just that.

Allen Bradley PowerFlex 40

Common Faults and My Real-World Solutions

Faults on a VFD are not random. They are a precise language. The drive is telling you exactly what is wrong. Here are some of the most common fault codes I encounter and how I approach them.

F002: UnderVoltage

This is one of the most common faults. It means the DC bus voltage has dropped below the minimum level. The fix is usually simple.

  • My take: Check your incoming line voltage. Is it stable? Power sags are a big culprit. Make sure your wiring is correct and tight. Loose connections can cause a voltage drop. Sometimes, it’s just the utility company having a bad day. I always check the supply first.

F004: OverVoltage

This is the opposite of F002. The DC bus voltage is too high. This often happens when a large load decelerates too quickly.

My take: The motor is acting like a generator and sending power back to the drive. You have two options. First, you can increase the deceleration time in your drive parameters. This slows the stop. The second and more robust solution is to use a dynamic braking resistor. This resistor safely dissipates the excess energy. Don’t ignore this fault; it can damage your drive.

F005: OverCurrent

This fault happens when the output current to the motor exceeds the limit. This can point to many different issues.

  • My take: This is a big one. It’s often the sign of a mechanical problem, not an electrical one. Is something jammed? Is the motor shaft seized? I always physically inspect the motor and the load first. If the mechanics are fine, check your motor parameters in the drive. Is the motor FLA (Full Load Amps) set correctly? Is the motor cable damaged? This fault is a warning; don’t just clear it without finding the root cause.

F008: Auto Tune Fault

The automatic tuning process failed. The drive couldn’t properly identify the motor’s electrical characteristics.

  • My take: This is often a sign of a bad connection between the drive and the motor. Check all motor wiring. Make sure your motor leads are securely connected to the drive terminals. Sometimes, the motor itself is the problem. A motor with a short or ground fault will cause auto-tuning to fail every time. Always verify your wiring and motor health.

F009: Drive OverTemp

The drive’s internal temperature sensor has tripped. The drive is too hot.

  • My take: This is about environment and airflow. Is the drive’s cooling fan working? Are the ventilation holes blocked with dust or debris? Is the drive enclosure too small? Or is it mounted near a heat source? I’ve seen this fault on drives mounted too close to boilers or ovens. Proper spacing and clean filters are key.
PowerFlex 40P AC Drive

PowerFlex 40P AC Drive

My Philosophy on VFD Troubleshooting

  1. Don’t panic. The fault code is not the end of the world. It’s a road map. Take a systematic approach.
  2. Don’t just reset: Find out why the fault happened.
  3. Check the simple stuff: Is the power on? Are the wires tight?
  4. Use a multimeter: Test the motor windings for shorts or opens. A multimeter is your best friend.
  5. Consult the manual: The PowerFlex 40 manual has a complete list of faults and suggested actions. It’s an essential tool.

A deep understanding of these codes and a systematic approach will save you time, money, and headaches. Don’t let a simple fault keep your line down.

Need replacement parts, a new drive, or expert technical support? Powergear X Automation Limited has what you need. Our parts are quality-tested and our team understands these drives inside and out. Click the link below to find the perfect solution for your PowerFlex 40 needs and get your system back to peak performance.

ModelTitleLink
22B-E4P2N104Allen-Bradley PowerFlex 40 VFD (3HP, 600V, 3-Phase)Learn More
22B-D4P0C104Allen-Bradley PowerFlex 40 AC Drive (230V)Learn More
22B-B012N104Allen-Bradley PowerFlex 40P DriveLearn More
22B-E6P6C104Allen-Bradley PowerFlex 40P AC DriveLearn More
Allen-Bradley PowerFlex 40P Frequency Drive

Troubleshooting Common Issues in Allen Bradley PowerFlex 40 AC Drives Guide

Introduction

Hello there! As an experienced controls engineer, I know how frustrating it can be when a drive stops working. The Allen Bradley PowerFlex 40 is a reliable workhorse, but like any piece of equipment, it can run into problems.

This guide will walk you through the most common issues and give you practical steps to get your system back up and running. Remember, safety first! Always de-energize the drive and wait for the DC bus capacitors to discharge completely before working on it.

Allen-Bradley PowerFlex 40P Frequency Drive

Troubleshooting Common Issues in Allen Bradley PowerFlex 40 AC Drives

The goal here isn’t just to fix the problem; it’s to understand why it happened so you can prevent it from happening again. I’ve found that paying attention to these small details saves a lot of headaches in the long run.

Under- and Overvoltage Faults (F6, F7)

These are probably the most common faults you’ll encounter.

  1. Undervoltage (F6): This means the DC bus voltage has dropped below a safe operating level.
  • Common Causes: The input power supply is low, there’s a loose connection, or a power outage occurred.
  • My Tip: Don’t just reset the fault. Grab your multimeter and check the input voltage at the drive’s L1, L2, and L3 terminals while the system is powered on. Compare it to the drive’s rating. If it’s consistently low, the issue is with your incoming power, not the drive itself.
  1. Overvoltage (F7): The DC bus voltage is too high.
  • Common Causes: A long deceleration time on a high-inertia load (like a fan or flywheel), or a problem with the braking resistor.
  • My Tip: For overvoltage faults, check your deceleration time parameter (parameter 41). If it’s set too short for your application, the motor’s kinetic energy is being fed back into the drive, causing the voltage to spike. Lengthening the deceleration time often solves this. If that doesn’t work, you might need a dynamic braking resistor.

Overcurrent Faults (F3)

This fault means the drive is drawing too much current.

  • Common Causes: A sudden load change, a short circuit in the motor windings, or a mechanical issue with the equipment.
  • My Tip: Before you assume the drive is bad, disconnect the motor leads from the drive and check the motor with a megohmmeter (megger). I’ve seen countless times where the motor itself had a winding short to ground, and the drive was just doing its job by tripping on overcurrent. Also, check for mechanical binding. Can you spin the motor shaft by hand?

Ground Faults (F5)

This happens when current leaks from the system to the ground.

  • Common Causes: Damaged motor insulation, a short circuit in the cabling, or water ingress in the motor or terminal box.
  • My Tip: This is a serious fault. Always check the motor and the motor cabling first. Use a megohmmeter to test the insulation resistance between each motor phase and ground. A good motor should show a very high reading (in the megaohms). If you get a low reading, you’ve found your culprit.
PowerFlex 40P AC Drive

PowerFlex 40P AC Drive

Getting Back to Work

Remember, these are just starting points. A detailed fault code in the drive’s manual will give you more specific guidance. The key is to be systematic in your troubleshooting. Don’t just hit the reset button over and over. Find the root cause!

For any parts or replacement drives you might need, you can rely on Powergear X Automation Limited for quality products and fast shipping.

Browse our selection of Allen Bradley PowerFlex 40 drives and accessories today!

ModelTitleLink
22B-D4P0N104Allen-Bradley PowerFlex 40 AC Drive (230V)Learn More
22B-D017H204Allen-Bradley PowerFlex 40 AC Drive (230V)Learn More
22B-D024F104Allen-Bradley PowerFlex 40 AC Drive (230V)Learn More
22B-D024H204Allen-Bradley PowerFlex 40 AC Drive (230V)Learn More
22B-D024N104Allen-Bradley PowerFlex 40 AC Drive (230V)Learn More
Understanding Fault Detection and Diagnostics in PLC DCS Systems

Understanding Fault Detection and Diagnostics in PLC & DCS Systems

Introduction

Welcome! As a seasoned engineer in industrial automation, I’ve seen firsthand how critical it is to quickly find and fix problems. In our world, where systems run 24/7, a small issue can quickly become a big headache. That’s where Fault Detection and Diagnostics (FDD) comes in. FDD isn’t just a fancy term; it’s a powerful set of tools and methods we use to keep things running smoothly. This guide will walk you through what FDD is, why it’s so important, and how you can use it effectively in your PLC and DCS systems.

Understanding Fault Detection and Diagnostics in PLC DCS Systems

What is Fault Detection and Diagnostics (FDD)?

At its core, FDD is the process of automatically identifying when something is wrong (detection) and then figuring out exactly what and where the problem is (diagnostics).

  • Fault Detection is like a security guard. It watches the system for any unusual behavior. For example, it might notice a motor drawing too much current or a temperature sensor giving a strange reading. The goal is to spot these anomalies before they cause a full shutdown.
  • Fault Diagnostics is the detective work. Once a fault is detected, this part of the process figures out the root cause. It answers questions like: “Is the sensor broken?” or “Is the valve stuck?” This helps maintenance teams fix the right thing the first time, saving a lot of time and effort.

Why Is FDD So Important for Your Systems?

Many people think FDD is a “nice-to-have” feature, but I believe it’s essential. My own experience has taught me that strong FDD leads to three key benefits:

  • Reduced Downtime: The biggest benefit is less unplanned downtime. When a system can tell you exactly what’s wrong, you don’t have to waste hours troubleshooting. You can go straight to the problem, fix it, and get back online faster. This directly impacts your bottom line.
  • Improved Safety: Many faults, if left unchecked, can create dangerous conditions. FDD helps you catch these issues early. For example, detecting a pressure sensor failure can prevent a potential over-pressure situation in a vessel, protecting both equipment and personnel.
  • Predictive Maintenance: Instead of waiting for something to break, FDD helps you move toward predictive maintenance. By tracking trends and small anomalies over time, you can schedule repairs before a component fails. This is a game-changer, allowing you to perform maintenance on your schedule, not your system’s.

Common FDD Methods and My Unique Insights

There are many ways to implement FDD. Here are some of the most common, along with some practical advice I’ve picked up over the years:

  • Alarming and Thresholds: This is the most basic form of FDD. We set up alarms to trigger when a value goes above or below a certain point. My advice here is simple but crucial: don’t overdo it. Too many alarms can lead to “alarm fatigue,” where operators start to ignore them. Focus on creating meaningful, prioritized alarms.
  • Logical Checks: This involves using programming logic within the PLC or DCS to verify sensor inputs. For example, if a pump is off, its flow sensor should read zero. If it doesn’t, you have a fault. My unique perspective is to always add a simple time delay to these checks. A momentary glitch shouldn’t trigger a full alarm.
  • Pattern Recognition: This is a more advanced technique where the system looks for specific patterns that indicate a fault. For instance, a valve that takes longer and longer to open might be getting stuck. This requires a bit more programming but can catch problems that simple thresholds miss. I recommend starting with critical components and expanding from there.

Moving Forward with FDD

Implementing a solid FDD strategy isn’t a one-time task; it’s an ongoing process. Start small, perhaps with a single critical machine, and then expand your efforts. The goal is to build a smarter, more resilient control system. The investment in FDD always pays off in the long run.

Ready to upgrade your system’s reliability and efficiency? We have the right tools and solutions to help you get started. Powergear X Automation Limited specializes in industrial control solutions designed for maximum uptime and performance.

👉 Click here to explore our products and take the first step towards a smarter, more reliable operation.

How to Optimize Your PLC Code for Maximum Performance and Reliability

Boosting Efficiency: How to Optimize Your PLC Code for Maximum Performance and Reliability

Introduction

Hello, fellow automation enthusiasts! I’m here to share some practical advice on a topic that’s critical to our work: writing efficient and reliable PLC code. As someone who’s spent years in the field, I know that good code doesn’t just work—it works well. It’s clean, easy to maintain, and performs flawlessly under pressure. In this guide, I’ll walk you through some key strategies to get the most out of your PLC systems, sharing a few unique insights I’ve picked up along the way.

How to Optimize Your PLC Code for Maximum Performance and Reliability

1. Simplify Your Logic: The “KISS” Principle

The “Keep It Simple, Stupid” (KISS) principle is a golden rule in PLC programming. Complex code is hard to troubleshoot and slow to execute. My advice? Break down complex processes into smaller, manageable subroutines or functions. Use simple, direct logic wherever possible. Instead of a single, sprawling routine with hundreds of rungs, create multiple, well-named routines for specific tasks like “Motor Control,” “Safety Interlocks,” or “HMI Communication.” This makes your code more readable and your system easier to debug.

2. Optimize Data Handling: Efficient Memory Management

Memory isn’t infinite, and how you use it directly impacts performance. One common mistake is using a mix of data types when a single type would suffice. For example, if you’re working with a set of boolean values, don’t use 16 separate INT variables. Use a single DINT or DWORD and manage the individual bits. This reduces memory usage and speeds up data access. Another tip: use structured text (ST) for mathematical calculations. It’s often more efficient and easier to read than a long chain of ladder logic rungs for complex math.

How to Optimize Your PLC Code for Maximum Performance and Reliability

3. Prioritize Your Scan Time: The Key to Reliability

The PLC scan time is the loop that executes your program. A long scan time can lead to missed events and system instability. To keep it short and consistent, avoid using a single, large program file. Use function blocks and subroutines to organize your code and, most importantly, execute code only when it’s needed. For example, use a trigger or a flag to call a complex diagnostic routine only after a fault has occurred, not on every scan. Also, be mindful of using indirect addressing or complex loops within your main scan, as these can add significant, unpredictable delays.

4. Unique Insight: Don’t Just Write Code, Write “Future-Proof” Code

This is my personal philosophy: write code for the next person who has to work on it, and that person might be you in five years. This means adding clear comments, using descriptive tag names (e.g., Motor1_Run_CMD instead of M1_R_C), and creating a consistent coding standard. My unique take is to document not just what the code does, but also why it does it. Explain the design choices and the logic behind them. This “why” documentation is invaluable for troubleshooting and modifications down the road, and it’s a practice many people overlook.

In Conclusion: The Path to Better Automation

Writing great PLC code is a skill that develops with experience and a commitment to best practices. By simplifying logic, optimizing data, managing scan time, and embracing a “future-proof” mindset, you can create systems that are not only efficient and reliable but also a pleasure to work with.

Ready to take your automation projects to the next level? Explore the robust and innovative solutions from Powergear X Automation Limited.

👉 Click here to check out our latest products and see how our hardware can complement your expertly crafted code!

Back to Top
Product has been added to your cart